These homemade gluten-free bagels are perfectly chewy and dense. Customized with your favourite toppings, these easy artisan bagels will be the best gluten-free bagels you've ever had. They are also dairy-free and easily vegan.
These gluten-free bagels have me so ridiculously excited for you to try them! Chewy, golden, and perfectly dense bagels that can be kneaded, shaped, boiled, and baked. It truly is a gluten-free dream. Not to mention they're also dairy-free and easily vegan.
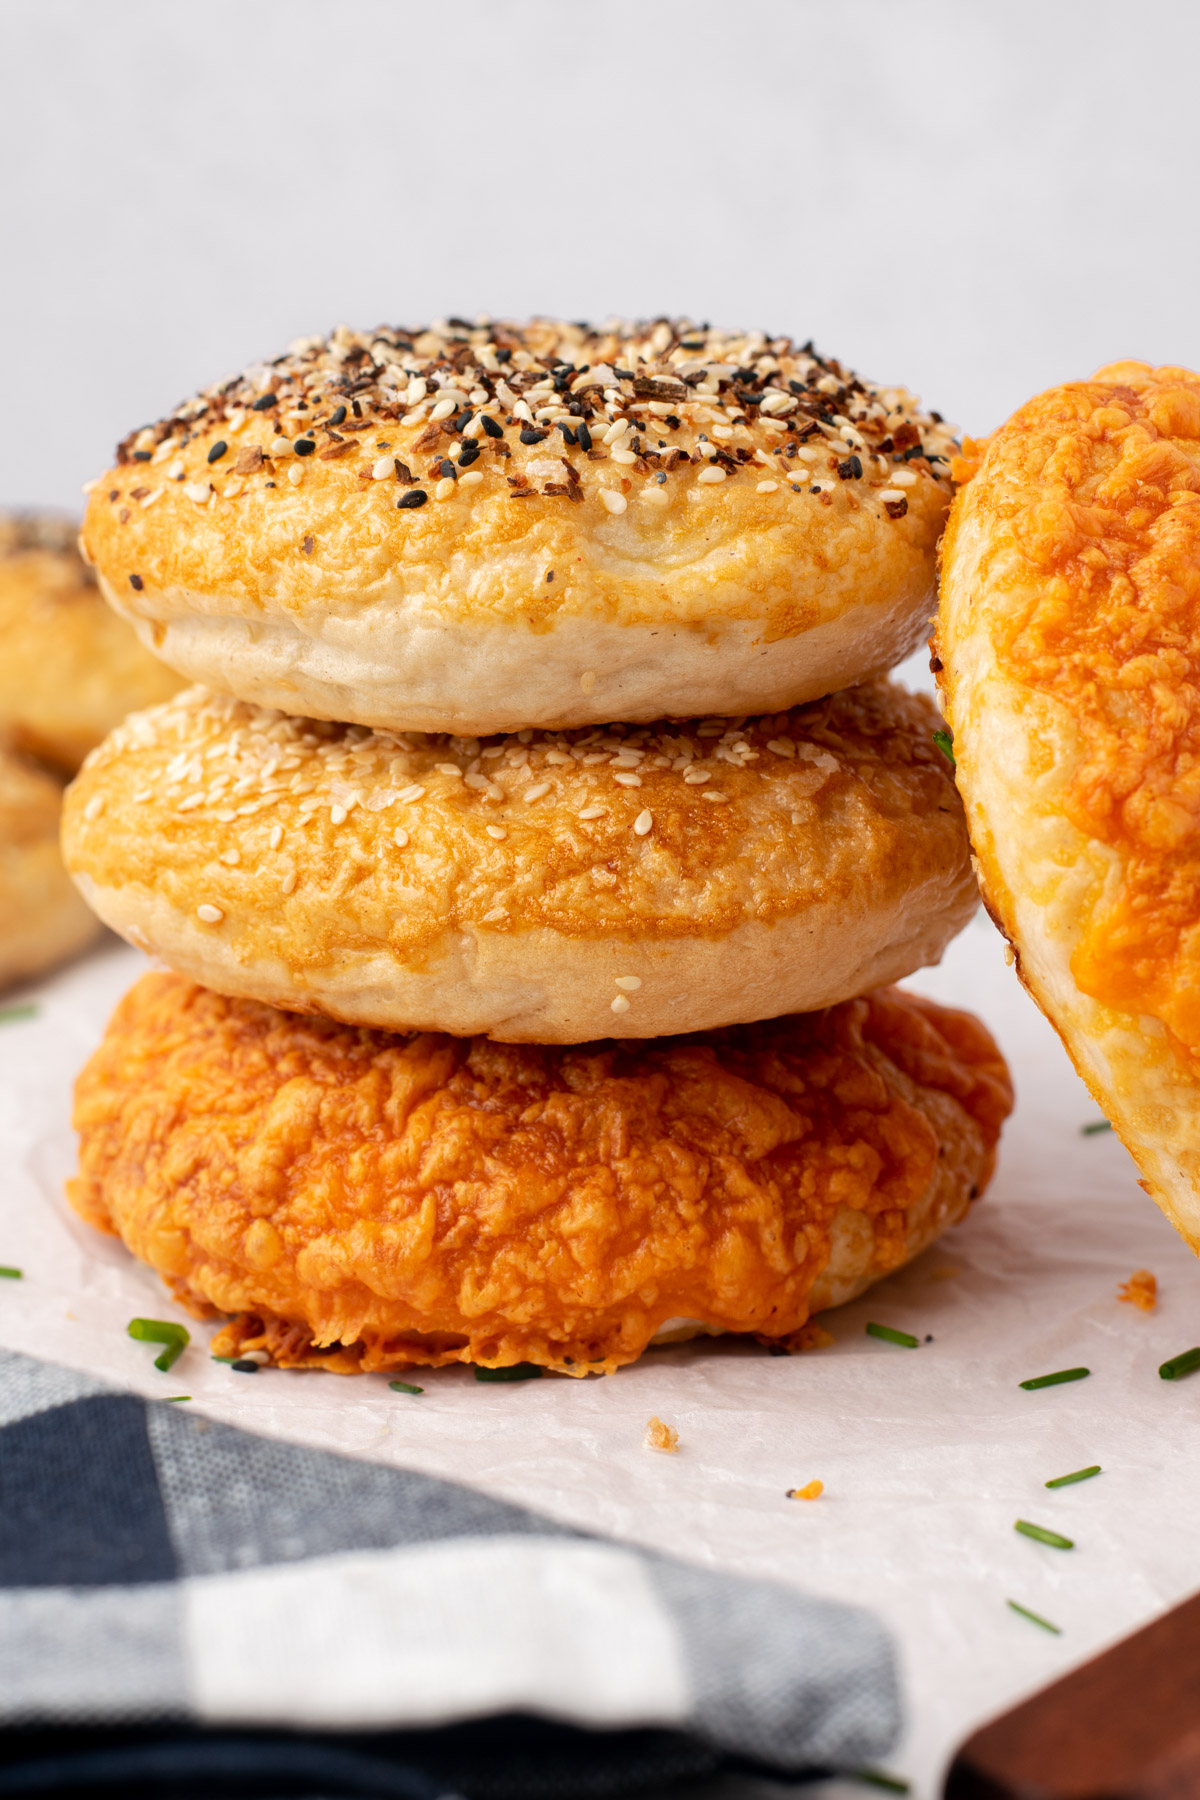
So why isn't everyone making amazing gluten-free bagels then? I'll let you in on the secrets: flour, technique, and flavours. I mean, have you ever seen a gluten-free cheese bagel before? I sure haven't!
I've got all the details here in this blog post for you, along with 17 step-by-step photos to ensure you too can bake up the best gluten-free bagels you've ever had. Please read the whole blog post for all of my tips and tricks to success. And I would love to hear how much you enjoyed them in a comment below!
Jump to:
Why You'll Love This Recipe
- Artisan gluten-free bagels at home. Need I say more? You'll be shocked how easy it is to make your own gluten-free bagels at home. Be sure to follow my tips and tricks in this blog post for optimal results!
- Allergy-friendly. This bagel recipe is naturally gluten, dairy, and nut-free, with easy substitutions for vegan as well.
- Customizable. See all of my recommendations for toppings and flavours below!
- So many uses. Enjoy plain, toast it up, spread it, make a sandwich... See my "How to Serve" section for more delicious ideas.
Ingredients
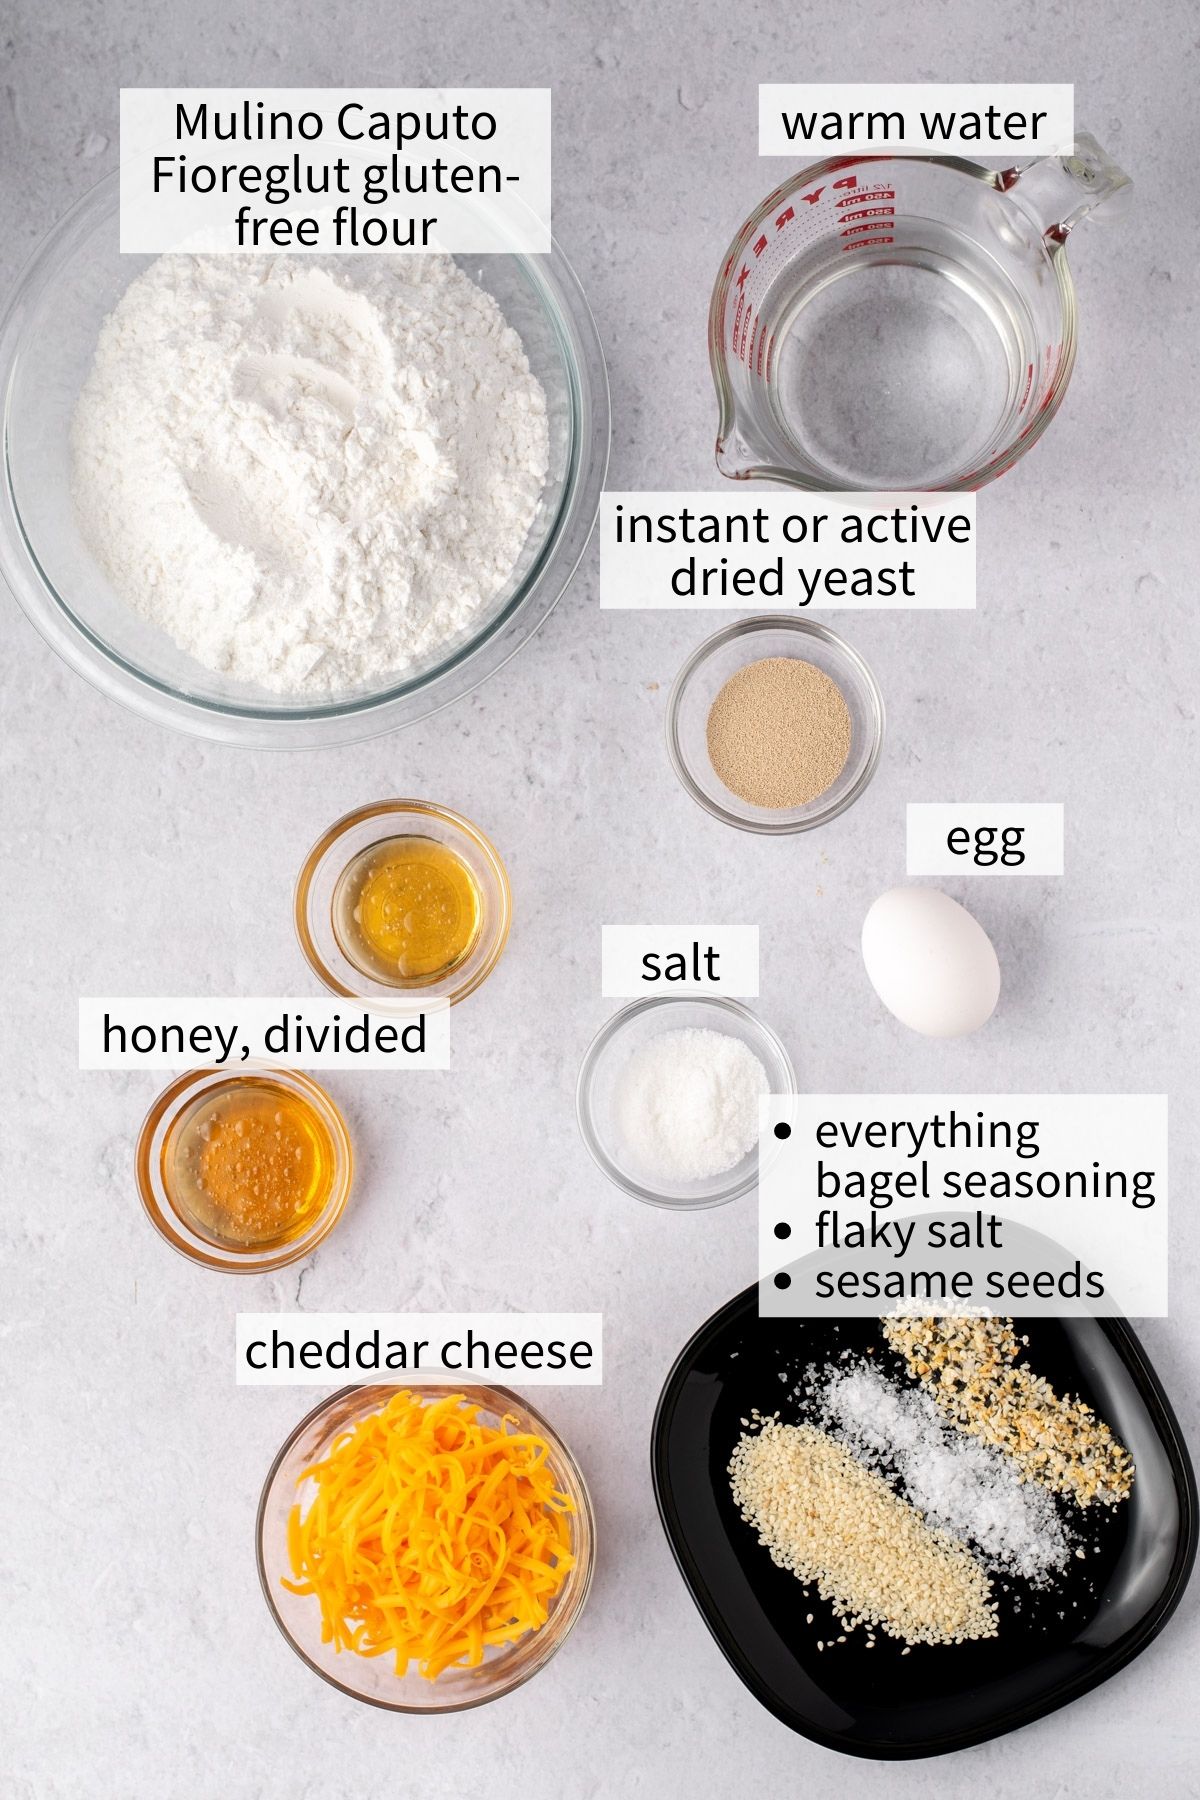
Here is everything you'll need to make these gluten-free bagels:
Bagel Ingredients
- Instant or active dried yeast: Either one will work in this recipe. Active dried yeast just needs to bloom for a bit longer than instant so keep that in mind. Timing is included in the step by step instructions.
- Honey: Honey serves multiple purposes in these bagels. Some honey is used to feed the yeast as the first step in making the bagels. That honey could be swapped for white granulated sugar if you want to keep these bagels vegan. The rest of the honey is stirred into the boiling water before baking. This honey could be omitted or substituted with about 1 teaspoon of baking soda. The honey or baking soda will give the bagels a dark and chewy crust.
- Warm water
- Mulino Caputo Fioreglut gluten-free flour: This flour is life-changing for a gluten-free person. It's actually made from wheat starch with the gluten removed. This allows it to behave that much more like regular gluten-ful flour. Yet it's totally safe for celiacs and the gluten-intolerant (unless you have a wheat allergy). You can usually find it on Amazon (for an exorbitant price mind you), or I've seen it in some local Italian markets. If you cannot find this exact flour, substitute with a gluten-free all-purpose flour blend, but note that your results may not be exactly the same.
- Salt
- Egg: For egg wash before baking. This gives the bagels nice colour. To keep these bagels vegan, omit the egg wash and instead brush with some dairy-free milk.
Toppings & Flavours
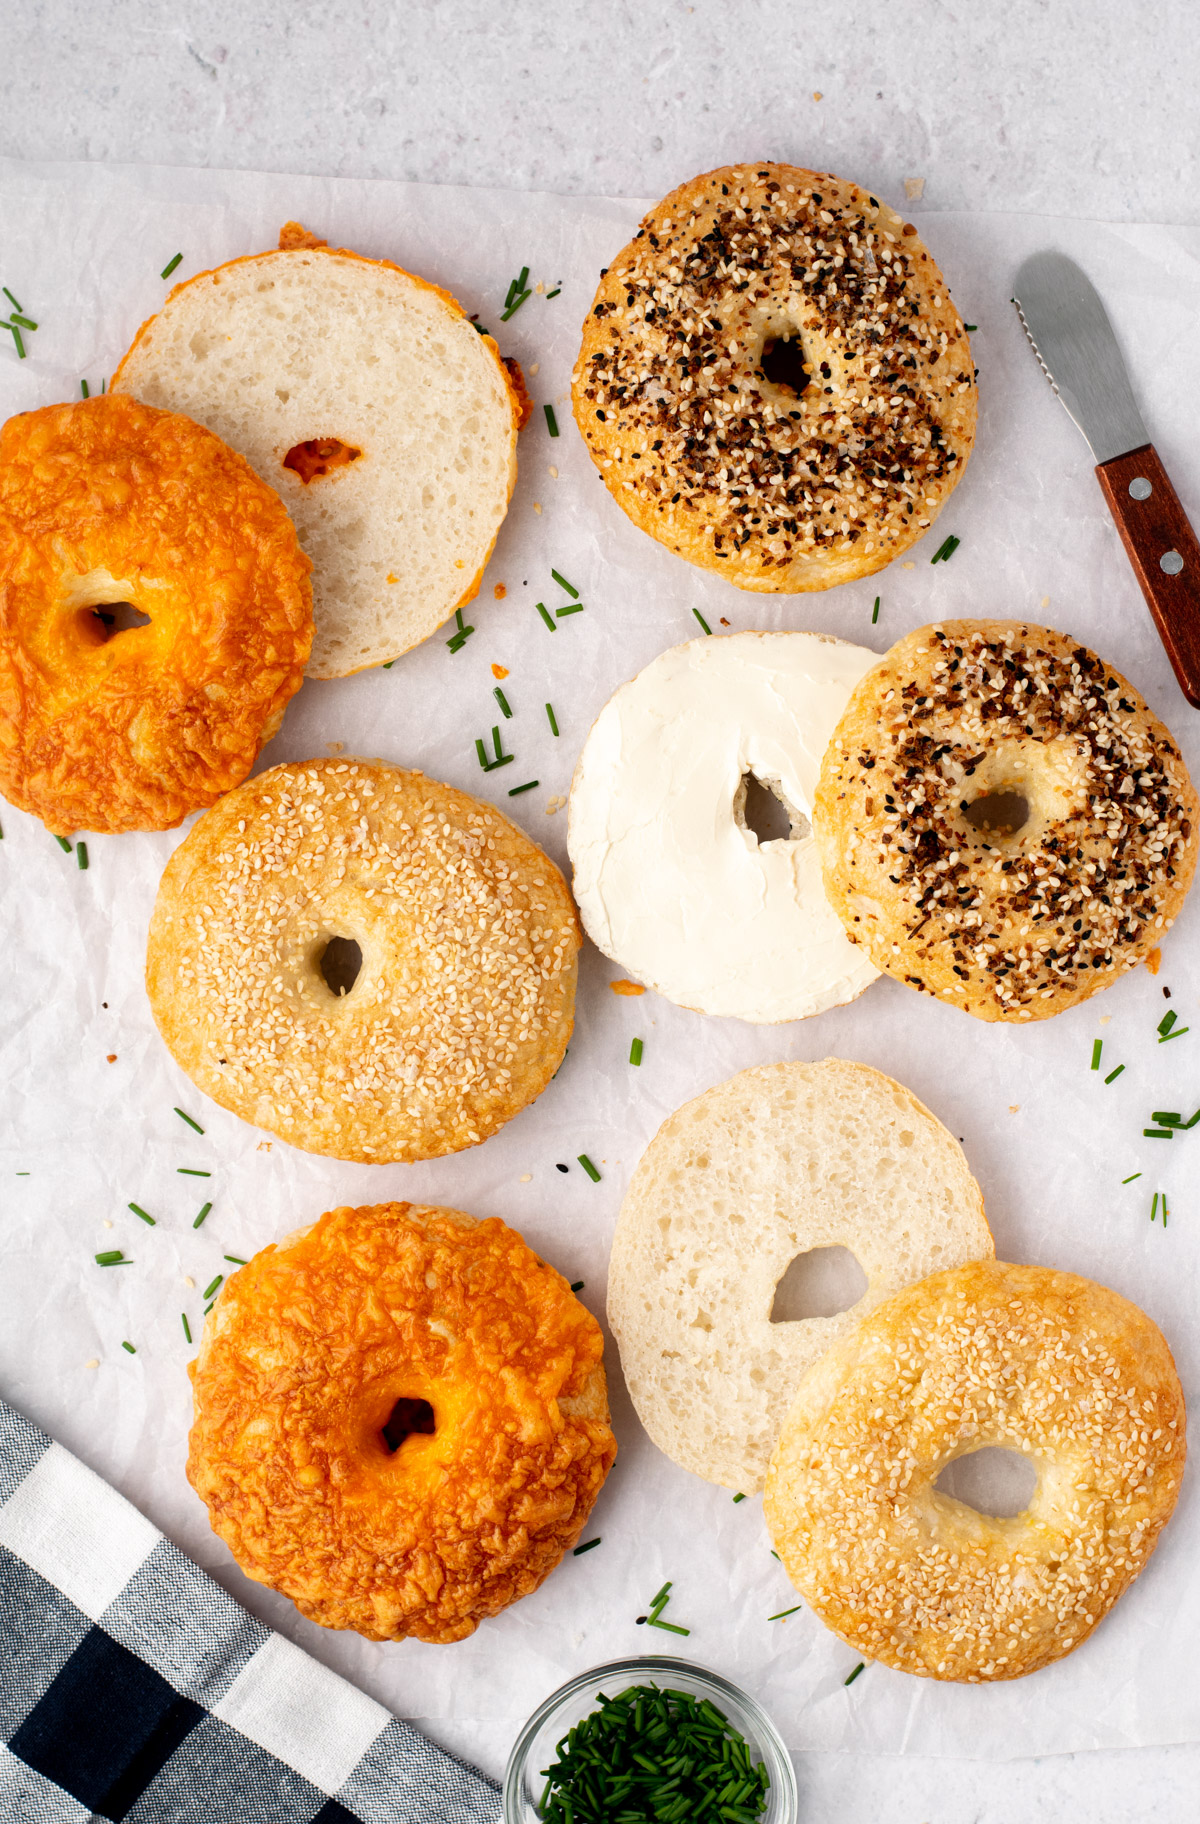
This is where you get to be creative! I love trying out different toppings for my bagels. If you're feeling adventurous, try some of these topping suggestions or create your own.
- Sesame seeds
- Flaky sea salt
- Everything bagel seasoning: A combo of poppy seeds, black and white sesame seeds, dried garlic, dried onion, and salt.
- Shredded old cheddar cheese: My personal favourite!
- Plain
- Garlic & herb: Top with some dried garlic, dill, and/or chives.
- Note that I have not tested a sweet version yet such as cinnamon raisin. In that, the spices and raisins should be folded into the dough. I'll have to test it out and report back on the method!

What Gluten-Free Flour to Use
Please note that the only flour I currently recommend for this recipe is the Mulino Caputo Fioreglut gluten-free flour. This flour is absolutely incredible for gluten-free yeasted doughs and breads because it contains gluten-free wheat starch which gives it amazing elasticity and workability. Yes, it is safe for celiacs. To learn more about gluten-free wheat starch, read this informative article from Wheat by the Wayside.
Unfortunately, it can be expensive and hard to find. Amazon carries it for $30 CAD per bag (1 kg), which is INSANE! No one should be paying that but unfortunately, it is the most accessible option. I purchase mine at local Italian stores, where a good price is $12 CAD a bag (1 kg). It is imported from Italy so those will be your best bet. Call around!
Note that I have not tested this recipe with any other flour, so unfortunately at this time I do not have another flour substitution. I do not recommend a 1:1 flour with xanthan gum as they tend to work poorly with yeast. I hope to develop my own blend that is comparable soon!
Substitutions
While these gluten-free bagels are crafted with optimal flavour pairings, there are a few areas in which you have the ability to make it your own! Here are some suggestions:
- Honey: Honey serves multiple purposes in these bagels. Some honey is used to feed the yeast as the first step in making the bagels. That honey could be swapped for white granulated sugar if you want to keep these bagels vegan. The rest of the honey is stirred into the boiling water before baking. This honey could be substituted with about 1 teaspoon of baking soda. The honey or baking soda will give the bagels a dark and chewy crust.
- Egg Wash: To keep these bagels vegan, omit the egg wash and instead brush with some dairy-free milk.
- Flour: I recommend using a specific flour in this recipe—Mulino Caputo Fioreglut gluten-free flour. It is amazing for gluten-free breads. It's actually made from wheat starch with the gluten removed. You can usually find it on Amazon (for an exorbitant price mind you), or I've seen it in some local Italian markets. If you cannot find this exact flour, substitute with a gluten-free all-purpose flour blend, but note that your results may not be exactly the same.
- Toppings: Make it your own! See the above section for my topping suggestions. Cheese bagels are my favourite.
- Uses: There are so many ways you can enjoy a fresh gluten-free bagel. Eat as is, toast it, spread it, use it as a sandwich, bagel chips, and more!
Step-by-Step Instructions
Be sure to read the recipe card below for the full ingredient list and instructions.
Make the dough
(Prep) To create a slightly warm proofing environment, preheat the oven to 100ºF. Once it reaches 100º, turn the oven off.
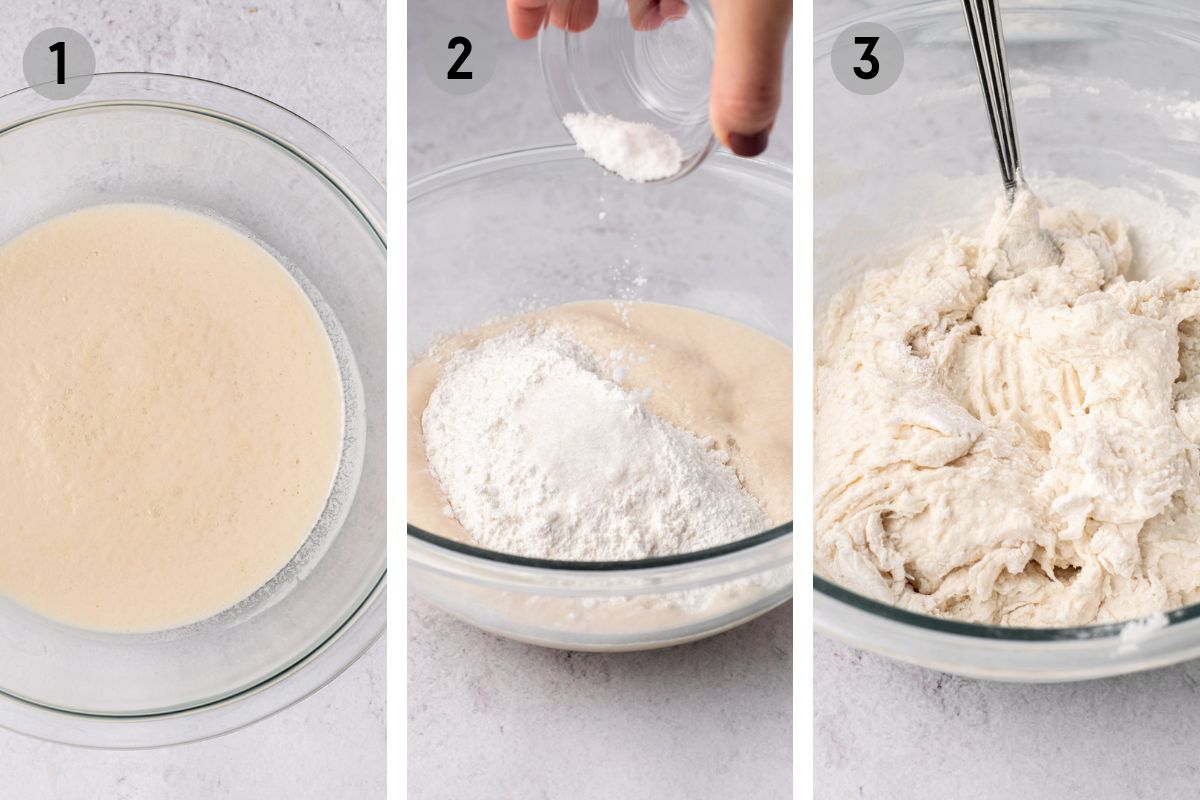
(1) Place the yeast, 1 tablespoon of honey, and warm water in a large bowl. The water should be warm to the touch, but not hot. Stir together with a fork to dissolve the yeast and sugar. Allow to sit for approximately 10 minutes if using instant yeast, and 15 minutes if using active dried yeast. The yeast should look very foamy and the bowl will be warm to the touch.
(2) & (3) Next, add the Mulino Caputo Fioreglut flour to the bowl, 1 cup at a time. Use a large fork or wooden spoon to stir. Stir in the salt after the second cup.
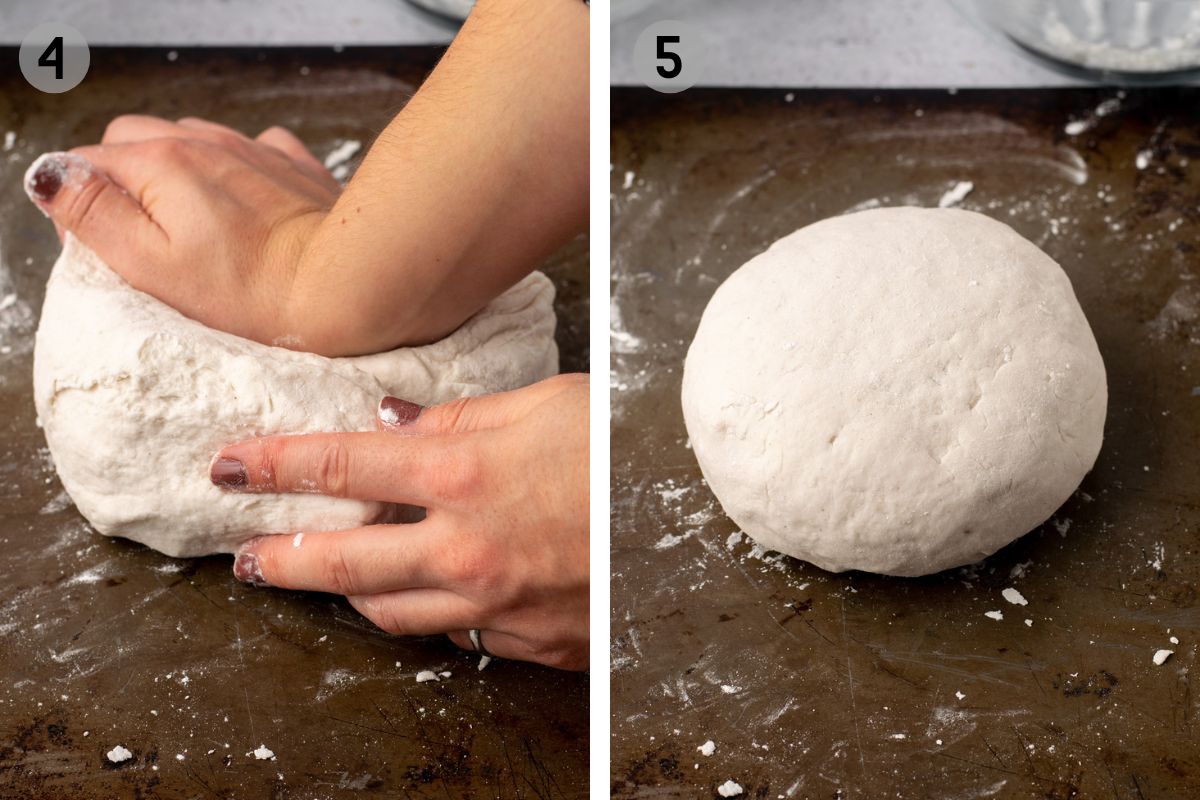
(4) Once the dough becomes too difficult to stir in the bowl, turn it out onto a lightly floured countertop. Lightly flour your hands and knead the dough, adding a small amount of flour if there are sticky parts. Knead together until you form a smooth dough ball.
(5) The ball should be smooth, soft, and slightly bouncy if you press it with your finger.
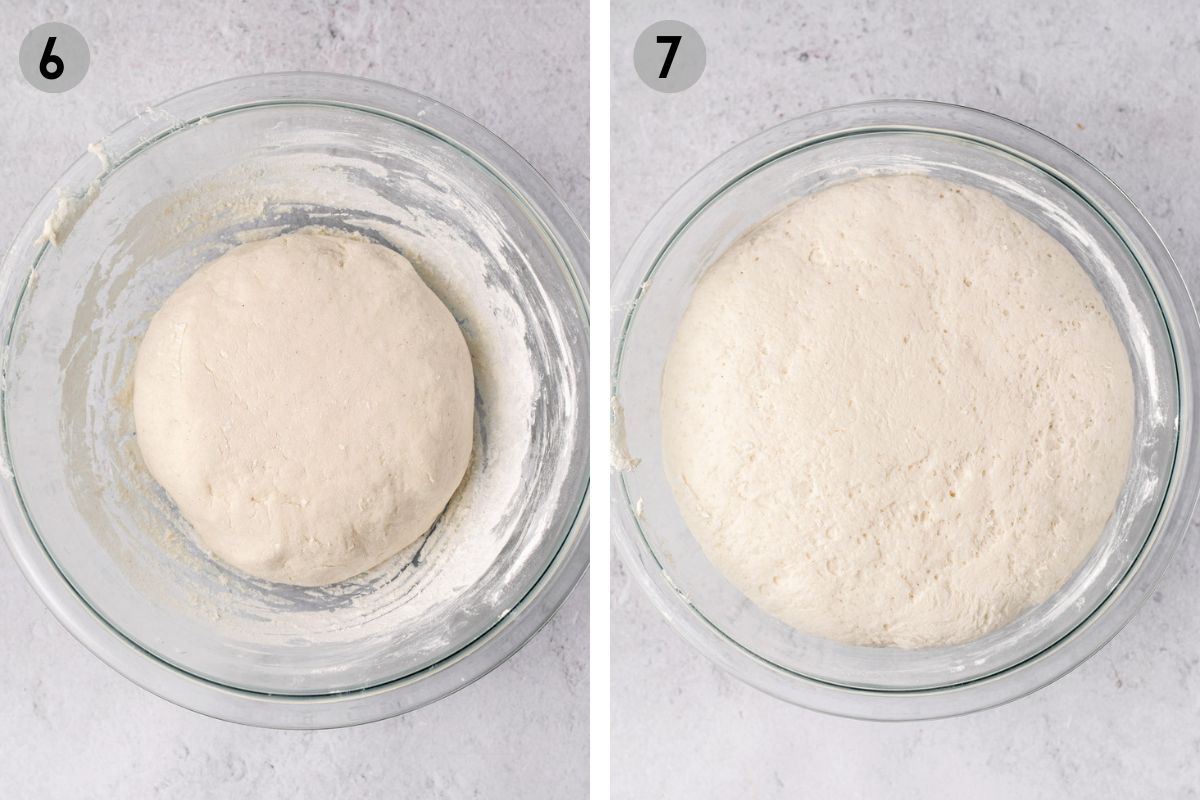
(6) Place the dough ball back in the large bowl. Cover the bowl with a large tea towel and place in the warm oven (turned off) to proof for 1 hour.
Shape the dough
(7) After 1 hour, remove the bowl from the oven. You will notice the dough has grown a lot. Turn the dough out onto a lightly floured countertop and divide into 6 equal pieces, approximately 130g each.
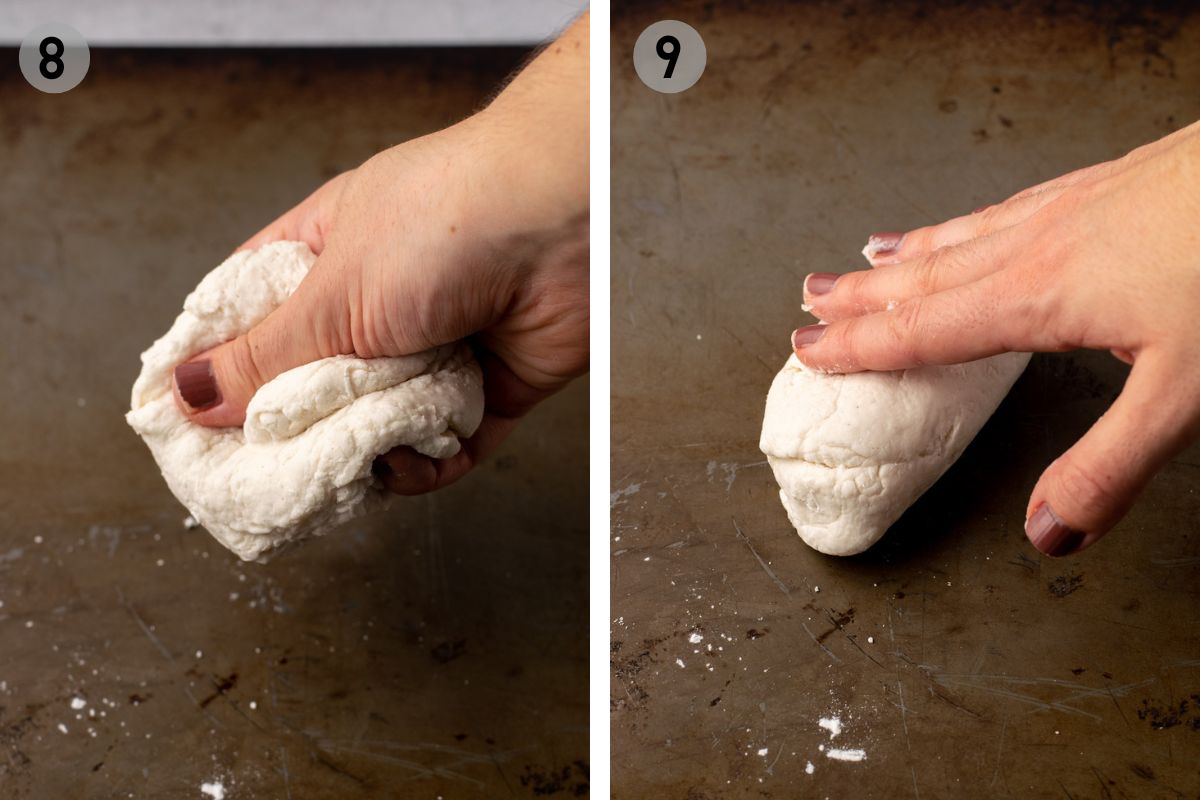
(8), (9), (10) To shape each bagel, roll and knead the dough until it forms a smooth ball. Dust with flour when necessary. It will take 1-2 minutes of kneading per ball. Once you have a smooth, round ball, gently flatten it into a thick disc.
(11) Flour your finger and poke a hole through the centre. Gently stretch the hole until you have a bagel shape. Over-exaggerate the centre hole, as the bagel will rise again. Place the shaped dough on a parchment-lined baking sheet with some room beside it. Repeat with the remaining 5 dough balls.

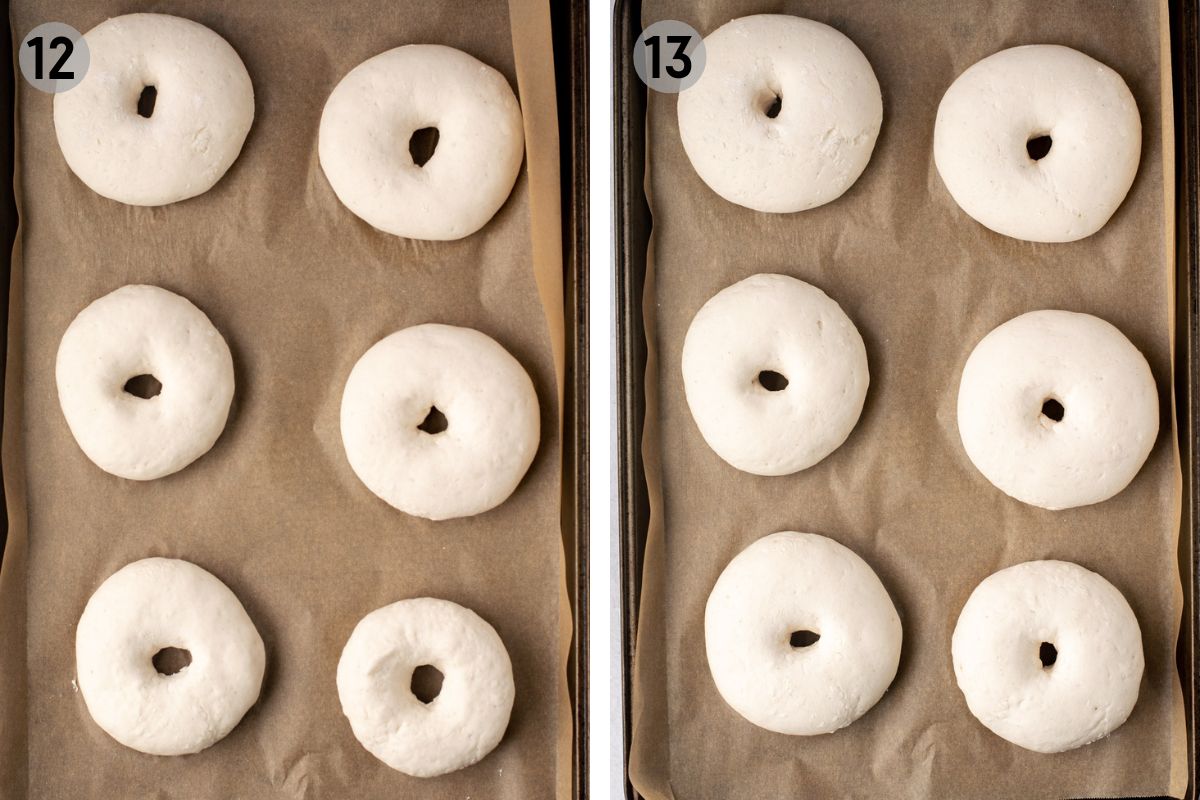
(12) Cover the baking sheet with a large tea towel and place in the oven to rise for 20 minutes. Then place the baking sheet on the counter to continue rising for another 10 minutes while you preheat the oven to 425ºF. At the same time, fill a large pot halfway with water, and place on high heat to come to a boil.
(13) The bagels will be larger and more plump after proofing.
Boil the bagels
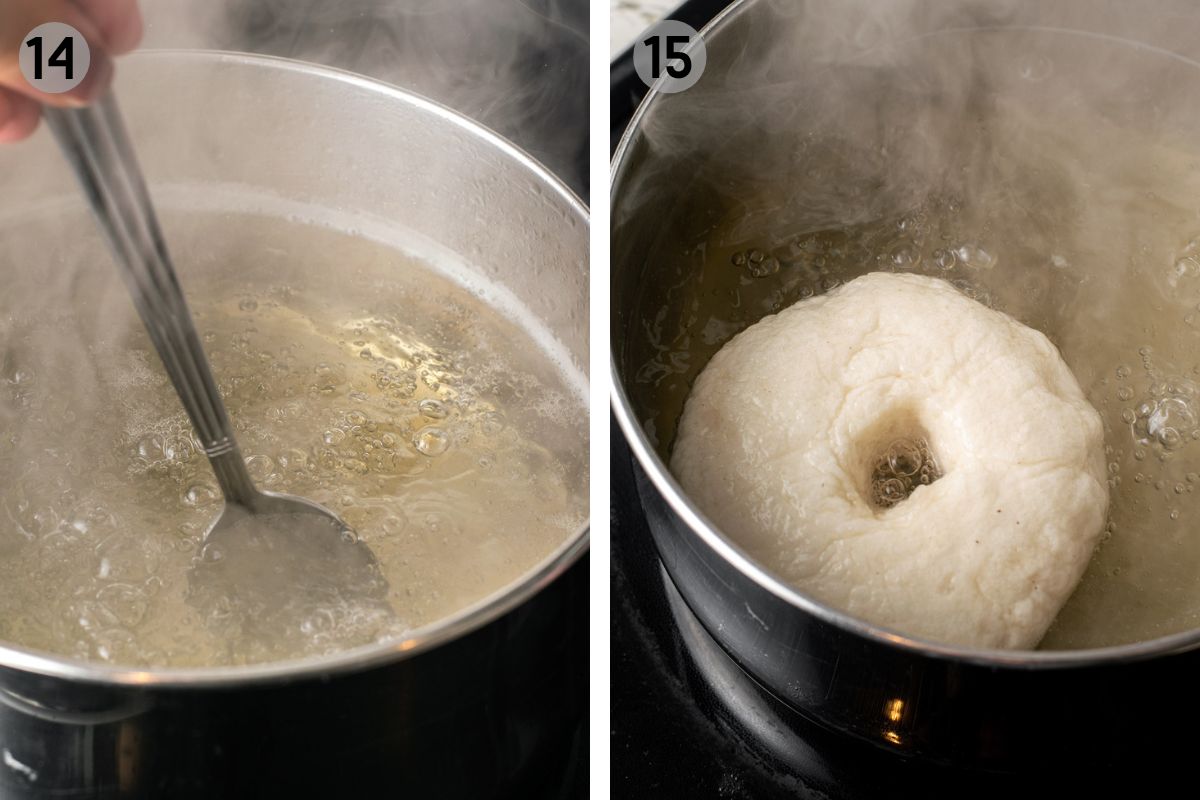
(14) Once the water has come to a boil, stir in the remaining 2 tablespoon of honey. Swirl with a large spoon to ensure the honey is fully dissolved in the water. Turn the heat down to medium-high.
(15) Exaggerate the centre hole of any bagels that need it. One at a time, gently pick up a bagel and place it in the boiling honey water. Boil for 45-60 seconds, then use a spatula or kitchen spider tool to flip the bagel and boil for another 45-60 seconds.
Use a slotted spoon or kitchen spider to remove the bagel from the water, and place back on the large parchment-lined baking sheet. Repeat quickly with all the bagels, ensuring space between them on the baking sheet(s).
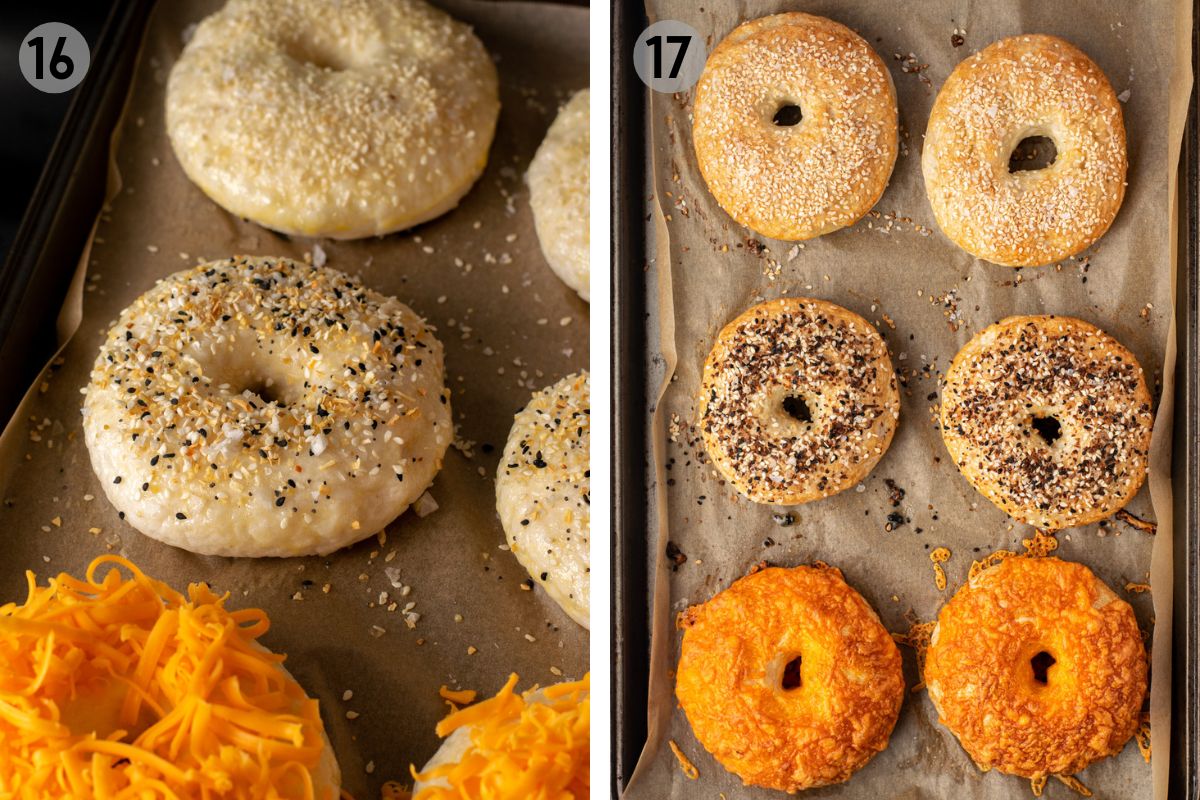
(16) Whisk the egg together and use a pastry brush to brush an egg wash on all of the bagels. Then top with your desired toppings: sesame seeds, flaky sea salt, everything bagel seasoning, poppy seeds, or a healthy handful of old cheddar cheese.
Bake the bagels
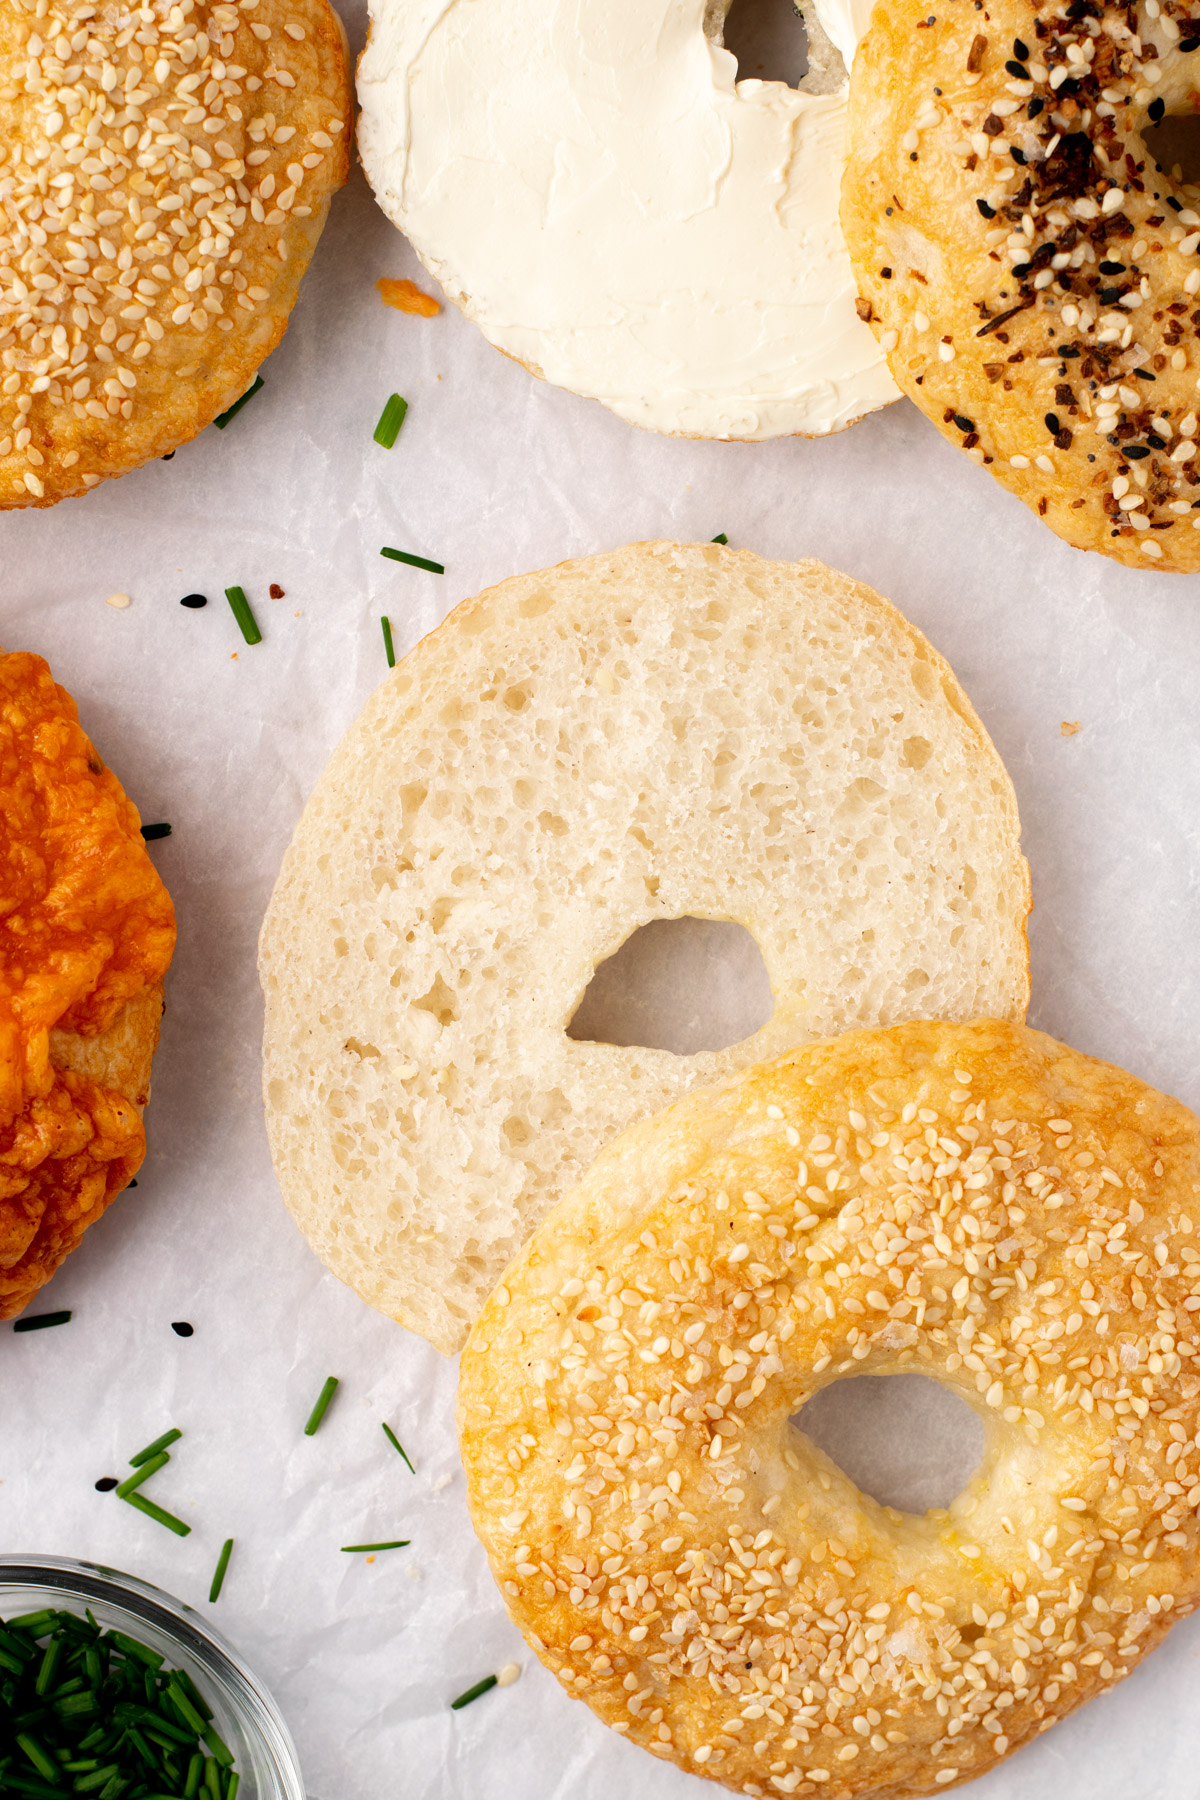
(17) Bake the bagels at 425ºF for approximately 25 minutes, until golden and round. Remove from the oven and cool on the baking sheet until you are able to handle them, then transfer to a wire rack to cool completely, about 2 hours. Bagels will have the best texture when completely cooled.
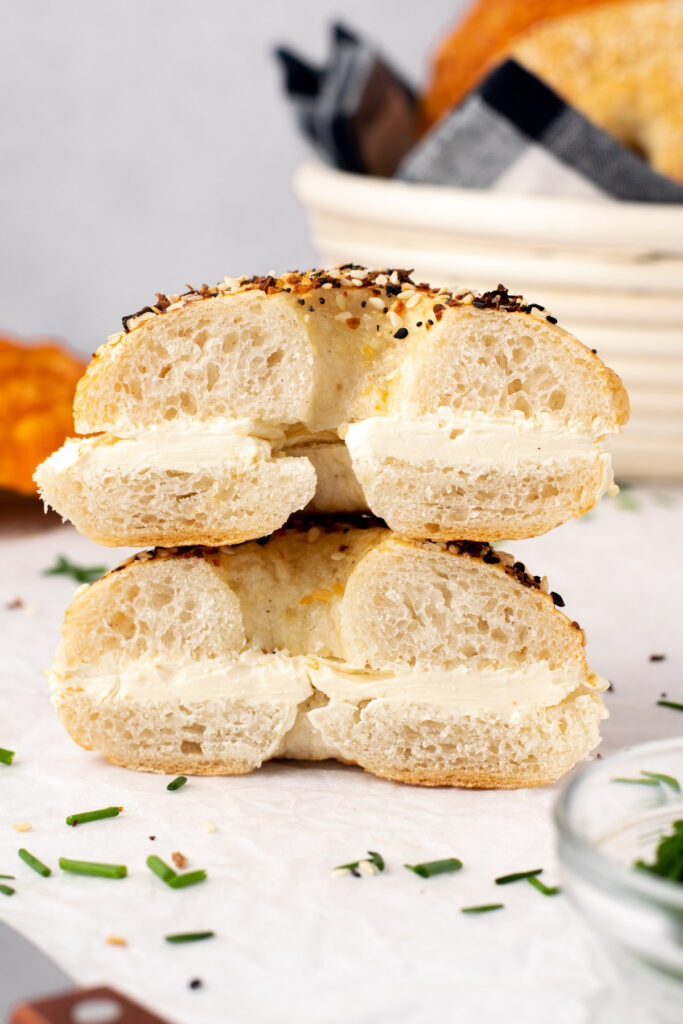
Slice horizontally and enjoy plain or toasted with your favourite spreads and sandwich fillings. See notes below for storage and freezing instructions.
How to Serve
There are so many ways to enjoy your fresh gluten-free bagels. Here are some suggestions:
- Plain. There's nothing better than fresh bread out of the oven. Let bagels cool slightly and enjoy all on their own.
- With your favourite spread. Butter, cream cheese, nut butter, jam, etc! Toasted or untoasted.
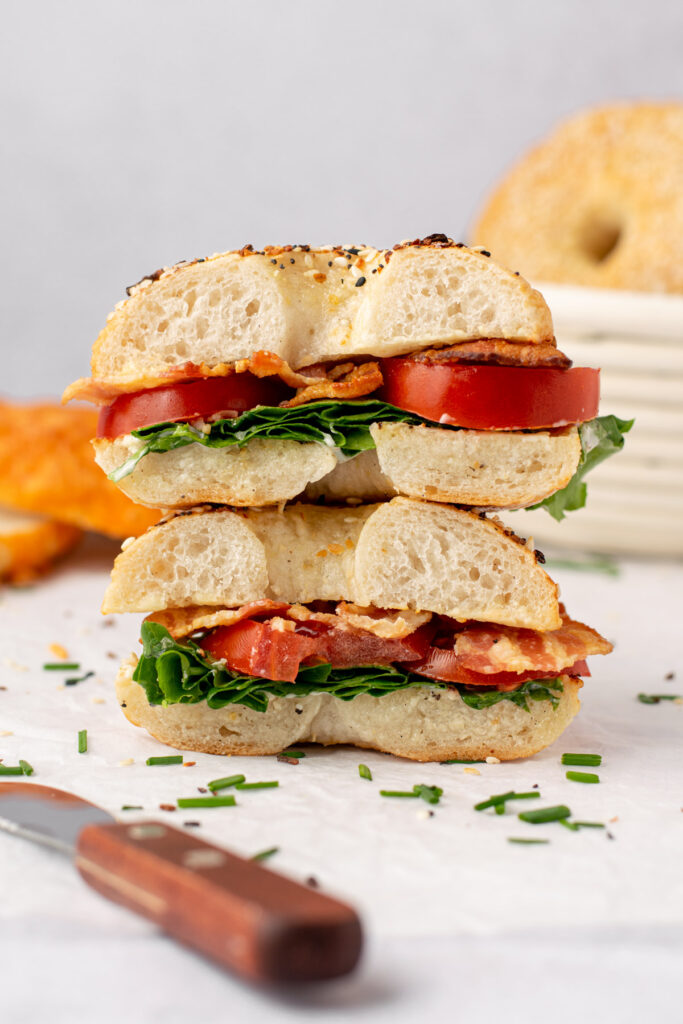
- As a sandwich. Fill with your favourite meats, cheese, or veggies and enjoy as a bagel sandwich. I recommend toasting the bagel beforehand to make it slightly more sturdy.
- Top the bagel as a pizza. Slice the bagel in half horizontally. Add your sauce of choice and toppings, then bake at 400ºF for about 10 minutes. Watch to ensure your toppings don't burn.
- Turn into bagel chips. Slice the bagels a few millimetres thick. You can slice right across the bagel, or slice around the bagel, making little circles. Toss the bagel slices in some olive oil with a little salt. Bake at 350ºF for about 10 minutes until crisp.
Storage & Freezing
Storage Instructions: Bagels are best on the day they are made. Bagels can be stored in an airtight container at room temperature for an additional 1-2 days max.
Freezing Instructions: Gluten-free bagels freeze very well. If you are not going to eat all of the bagels within 1-2 days, it is best to freeze them. Before freezing, slice bagels horizontally. Wrap each bagel individually in plastic wrap or aluminum foil. Then place bagels in an airtight, freezer safe container. Freeze for up to 3 months. Remove bagels as you need them.
To thaw quickly, place a bagel in the microwave for 20 seconds. Flip it upside down and microwave for another 20 seconds. Toast the bagel for the best texture and top with your favourite spread or sandwich ingredients. Enjoy fresh bagels at any time!
Expert Tips
- Use the recommended flour. Mulino Caputo Fioreglut is a very unique flour that is gluten-free, yet contains wheat starch. It has amazing elasticity and kneading properties. I find it on Amazon and at local Italian markets. If you cannot find it, use another gluten-free 1:1 flour, but note that results may not be the same.
- Really knead until smooth. The same goes in both kneads: the bulk dough and the individual bagels. Squishing, rolling, and kneading the dough until there are no dry and no sticky spots is important in achieving a smooth and round bagel.
- How to form the bagel shape. Some like to roll a long log and twist it into a circle. This gluten-free dough is a bit too delicate for that. I roll the individual dough into a circle, then use 1 finger to poke a hole through. I then pull to exaggerate the hole, as it will close slightly during the second proof.
- Top it up! Not all 6 bagels have to have the same toppings. See my recommendations in the ingredients section for flavours.
- Let cool for at least 30 minutes before eating. If you're going to have a warm bagel, let it sit for at least 30 minutes before cutting. If you cut it right away, the bagel will lose a lot of heat and moisture, resulting in a less pleasant texture.
- Slice the bagels before freezing. Make your life easier by doing this. No one likes trying to cut a partially frozen bagel.
Frequently Asked Questions
The only ingredient that would make these bagels not vegan is honey. Honey is used in two places in this recipe. It is first used to feed the yeast. This honey can easily be swapped for white granulated sugar. Honey is then stirred into the water to boil the bagels. Here, honey helps give the bagels their classic chewy crust. Instead of using honey, just boil the bagels in plain water, or add 1 teaspoon of baking soda for a dark and chewy crust.
I recommend using Mulino Caputo Fioreglut gluten-free flour. It is actually wheat starch with the gluten removed (and yes it is celiac-safe). This allows it to produce wonderful breads, very reminiscent of the properties of gluten. If you cannot find this specific flour, you can try using another gluten-free 1:1 flour blend, but the results may differ.
Boiling the bagels, particularly in honey water, helps them achieve that classic golden, chewy crust. When the bagels boil, the outside cooks a little bit, and that continues when they are baked in the oven. As the outside sets before the inside, that chewy crust texture is achieved. The honey is a classic addition from Montreal bagels, adding subtle sweetness and golden colour.
Yes, gluten-free bagels freeze very well. Before freezing, slice bagels horizontally. Wrap each bagel individually in plastic wrap or aluminum foil. Then place bagels in an airtight, freezer safe container. Freeze for up to 3 months. Remove bagels as you need them.
To thaw quickly, place a bagel in the microwave for 20 seconds. Flip it upside down and microwave for another 20 seconds. Toast the bagel for the best texture and top with your favourite spread or sandwich ingredients.
Note that I have not tried this bagel recipe with a sweet flavour such as cinnamon raisin, yet! This also includes bagel flavours where ingredients are mixed into the dough such as the raisins. I do think it should work well, I just haven't tried it yet! Ingredients in the dough may affect proofing time. If you try it, leave me a comment below.
There you have delicious homemade gluten-free bagels. This recipe is naturally dairy-free and easily vegan. These bagels are perfectly dense, chewy, and full of flavour. The magic is in the flour! Bake up a big batch of gluten-free bagels and freeze for whenever the craving strikes—I promise you won't regret it!
More Gluten-Free Breads
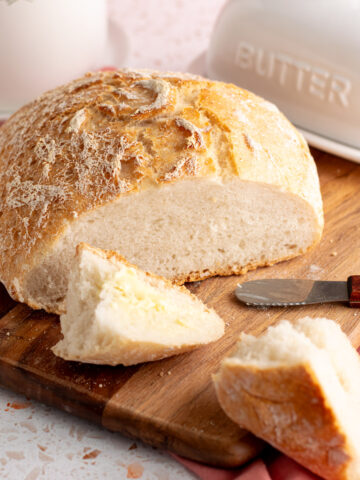
- Gluten-Free Focaccia
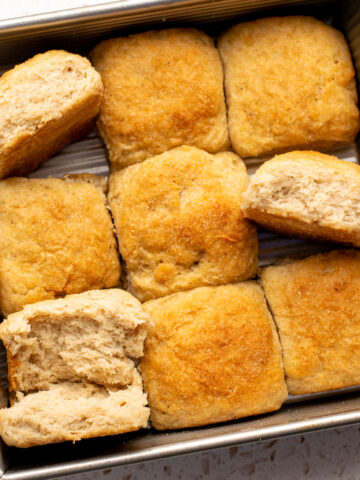
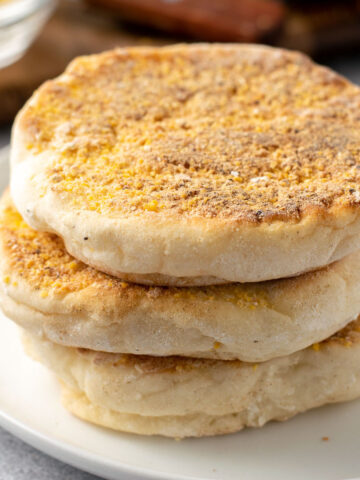
- Gluten-Free English Muffins
- Gluten-Free Panzanella Salad
- Fig & Prosciutto Pizza with Goat Cheese
- Gluten-Free Cheese Scones
Related Recipes

Have you made these gluten-free bagels? I'd very much appreciate it if you leave a 5-star ⭐️⭐️⭐️⭐️⭐️ review below, and tag me on instagram @fromoliviaskitchen!
Recipe

Best Homemade Gluten-Free Bagels
Ingredients
Bagels
- 2¼ teaspoon instant or active dried yeast
- 3 tablespoon honey separated, see notes for vegan substitution
- 1½ cups warm water
- 3½ cups (440g) Mulino Caputo Fioreglut gluten-free flour this flour is very important
- 2 teaspoon salt
- 1 egg for egg wash, see notes for vegan substitution
Toppings
- Sesame seeds
- Flaky salt
- Everything bagel seasoning
- Shredded old cheddar cheese
Instructions
Make the dough
- To create a slightly warm proofing environment, preheat the oven to 100ºF. Once it reaches 100º, turn the oven off.
- Place the yeast, 1 tablespoon of honey, and warm water in a large bowl. The water should be warm to the touch, but not hot. Stir together with a fork to dissolve the yeast and sugar. Allow to sit for approximately 10 minutes if using instant yeast, and 15 minutes if using active dried yeast. The yeast should look very foamy and the bowl will be warm to the touch.
- Next, add the Mulino Caputo Fioreglut flour to the bowl, 1 cup at a time. Use a large fork or wooden spoon to stir. Stir in the salt after the second cup. Once the dough becomes too difficult to stir in the bowl, turn it out onto a lightly floured countertop. Lightly flour your hands and knead the dough, adding a small amount of flour if there are sticky parts. Knead together until you form a smooth dough ball. The ball should be smooth, soft, and slightly bouncy if you press it with your finger. Place the dough ball back in the large bowl. Cover the bowl with a large tea towel and place in the warm oven (turned off) to proof for 1 hour.
Shape the dough
- After 1 hour, remove the bowl from the oven. You will notice the dough has grown a lot. Turn the dough out onto a lightly floured countertop and divide into 6 equal pieces, approximately 130g each.
- To shape each bagel, roll and knead the dough until it forms a smooth ball. Dust with flour when necessary. It will take 1-2 minutes of kneading per ball. Once you have a smooth, round ball, gently flatten it into a thick disc. Flour your finger and poke a hole through the centre. Gently stretch the hole until you have a bagel shape. Over-exaggerate the centre hole, as the bagel will rise again. Place the shaped dough on a parchment-lined baking sheet with some room beside it. Repeat with the remaining 5 dough balls.
- Cover the baking sheet with a large tea towel and place in the oven to rise for 20 minutes. Then place the baking sheet on the counter to continue rising for another 10 minutes while you preheat the oven to 425ºF. At the same time, fill a large pot halfway with water, and place on high heat to come to a boil.
Boil the bagels
- Once the water has come to a boil, stir in the remaining 2 tablespoon of honey. Swirl with a large spoon to ensure the honey is fully dissolved in the water. Turn the heat down to medium-high.
- Exaggerate the centre hole of any bagels that need it. One at a time, gently pick up a bagel and place it in the boiling honey water. Boil for 45-60 seconds, then use a spatula or kitchen spider tool to flip the bagel and boil for another 45-60 seconds. Use a slotted spoon or kitchen spider to remove the bagel from the water, and place back on the large parchment-lined baking sheet. Repeat quickly with all the bagels, ensuring space between them on the baking sheet(s).
- Whisk the egg together and use a pastry brush to brush an egg wash on all of the bagels. Then top with your desired toppings: sesame seeds, flaky sea salt, everything bagel seasoning, poppy seeds, or a healthy handful of old cheddar cheese.
Bake the bagels
- Bake the bagels at 425ºF for approximately 25 minutes, until golden and round. Remove from the oven and cool on the baking sheet until you are able to handle them, then transfer to a wire rack to cool completely, about 2 hours. Bagels will have the best texture when completely cooled. Slice horizontally and enjoy plain or toasted with your favourite spreads and sandwich fillings. See notes below for storage and freezing instructions.
Notes
- Honey Substitution: Some honey is used to feed the yeast. That honey could be swapped for white granulated sugar if you want to keep these bagels vegan. The rest of the honey is stirred into the boiling water before baking. This honey could be substituted with 1 teaspoon of baking soda. This will give the bagels a dark and chewy crust.
- Egg Wash: To keep these bagels vegan, omit the egg wash and instead brush with some dairy-free milk.
- Flour: I recommend using a specific flour in this recipe—Mulino Caputo Fioreglut gluten-free flour. It is amazing for gluten-free breads. I cannot guarantee your results using another flour.
- Storage: Bagels are best on the day they are made. Bagels can be stored in an airtight container at room temperature for an additional 1-2 days max.
- Freezing: If you are not going to eat all the bagels within 1-2 days, it is best to freeze them. Before freezing, slice bagels horizontally. Wrap each bagel individually in plastic wrap or aluminum foil. Then place bagels in an airtight, freezer safe container. Freeze for up to 3 months.
- Remove bagels as you need them. To thaw quickly, place a bagel in the microwave for 20 seconds. Flip it upside down and microwave for another 20 seconds. Toast the bagel for the best texture and top with your favourite spread or sandwich ingredients. Enjoy fresh bagels at any time!
Maddi says
This GF bagel recipe is a GAME CHANGER. It is seriously the best thing that has happened to me since I had to go gluten and dairy free. Do yourself a favor and make these bagels!
Olivia Parsons says
Thanks for your review, Maddi! I'm so happy you were finally able to enjoy gluten-free and dairy-free bagels!
Tricia says
This is a great GF bagel option and I love the gF flour choice. My only change to this is I am looking for the best egg wash substitute.. I'm open to suggestions if u have any. Butter has been my go to so far
Olivia Parsons says
Hi Tricia! I'm so glad you love these GF bagels like I do. I'm a big fan of the egg wash but yes I would try butter or a high-fat milk as a substitute for that nice golden colour.
Kim Everett says
These bagels taste better than non-gluten free bagels. Amazing!! They are a must try.
Olivia Parsons says
So glad to hear, Kim! Thanks for your review.
Katie says
These make delicious bagels! Just a note that when using the 2x or 3x feature it doesn’t change the flour quantity in grams only cups - not tricky to adjust yourself but just a reminder.