These starbucks-inspired gluten-free pumpkin scones taste just like the treat you remember, without the gluten and dairy! Warm, spicy, and cozy, these gluten-free, dairy-free pumpkin scones are sure to be a fall favourite.

It's finally pumpkin spice season! Enter these deliciously warm gluten-free, dairy-free Starbucks-inspired pumpkin scones.
Now is the time for all things warm, cozy, and homey. I have the fondest memories of going to Chapters with my family as a child and getting an apple cider and a pumpkin scone from the Starbucks while browsing the books. My book reading has definitely decreased since then, while my pumpkin spice consumption has skyrocketed. Pumpkin spice everything!
Introducing my Gluten-Free Pumpkin Scones (Starbucks Copycat)! They are soft, spicy, and perfect when dipped in a PSL. I kid you not they taste exactly like the Starbucks scones. All the same coziness, minus the food allergies. I am so proud of this recipe and this photoshoot. Not to mention how easy and attainable these little scones are to make.
You'll be sure to impress guests, friends, or family when you present them with these allergy-friendly pumpkin scones. Keep reading to find out all of my tips and tricks for how to make them pumpkin-perfect!
Looking for more fall treats? Why not check out some of these:
- Healthier Vegan Pumpkin Spice Latte
- Vegan Pumpkin Pasta Sauce
- Allergy-Friendly Halloween Dirt Cups
- Dairy-Free Vampire Bite Cupcakes
Jump to:
Why You'll Love This Recipe
- Tastes just like the Starbucks treat you remember! Minus the gluten and dairy. These scones truly are coffee shop quality!
- Easy to make. Just mix, shape, bake, ice, enjoy.
- These pumpkin scones are gluten-free, dairy-free, and easily nut-free. Perfect for sharing with friends and family.
Ingredients Needed
The thing I love most about these bakery-style pumpkin scones is how simple they are to prepare. You probably have all the ingredients already in your pantry. Here's what you'll need:


Scone Ingredients
- Gluten-free all-purpose flour: My favourite is Bob's Red Mill 1:1 Baking Flour (blue bag). You can use another brand that you have on hand, but a 1:1 replacement flour is key here.
- Baking powder
- Baking soda: The combination of both leaveners gives the perfect rise and texture.
- Salt
- Pumpkin pie spice: You can typically find this pre-mixed this time of year. If you can't, use a mix of cinnamon, nutmeg, ginger, and cloves.
- Coconut sugar: One of my favourite less-refined sugars. You can also use brown sugar.
- Vegan butter, cold & cubed: Because the butter has to be cut into the dry ingredients, it must be very cold. Try to use a vegan butter that is in stick/brick form, as they keep more solid than butters in tubs. I've used Becel bricks (not in the tub) and Melt Organic and had great results. If you're not dairy-free, you can also use regular butter.
- Pumpkin purée: Because it's in the name! Pumpkin purée adds nice moisture and flavour to these scones.
- Buttermilk: A dairy-free buttermilk is made from combining a small amount of vinegar with dairy-free milk. This will react with the baking soda to form the perfect soft and slightly crumbly scone texture. A small amount of dairy-free milk will also be used to brush the scones before baking.
- Egg: This is quite integral in binding the scones. Try using an egg replacement to make these scones vegan, although I have not tested it.
- Vanilla extract
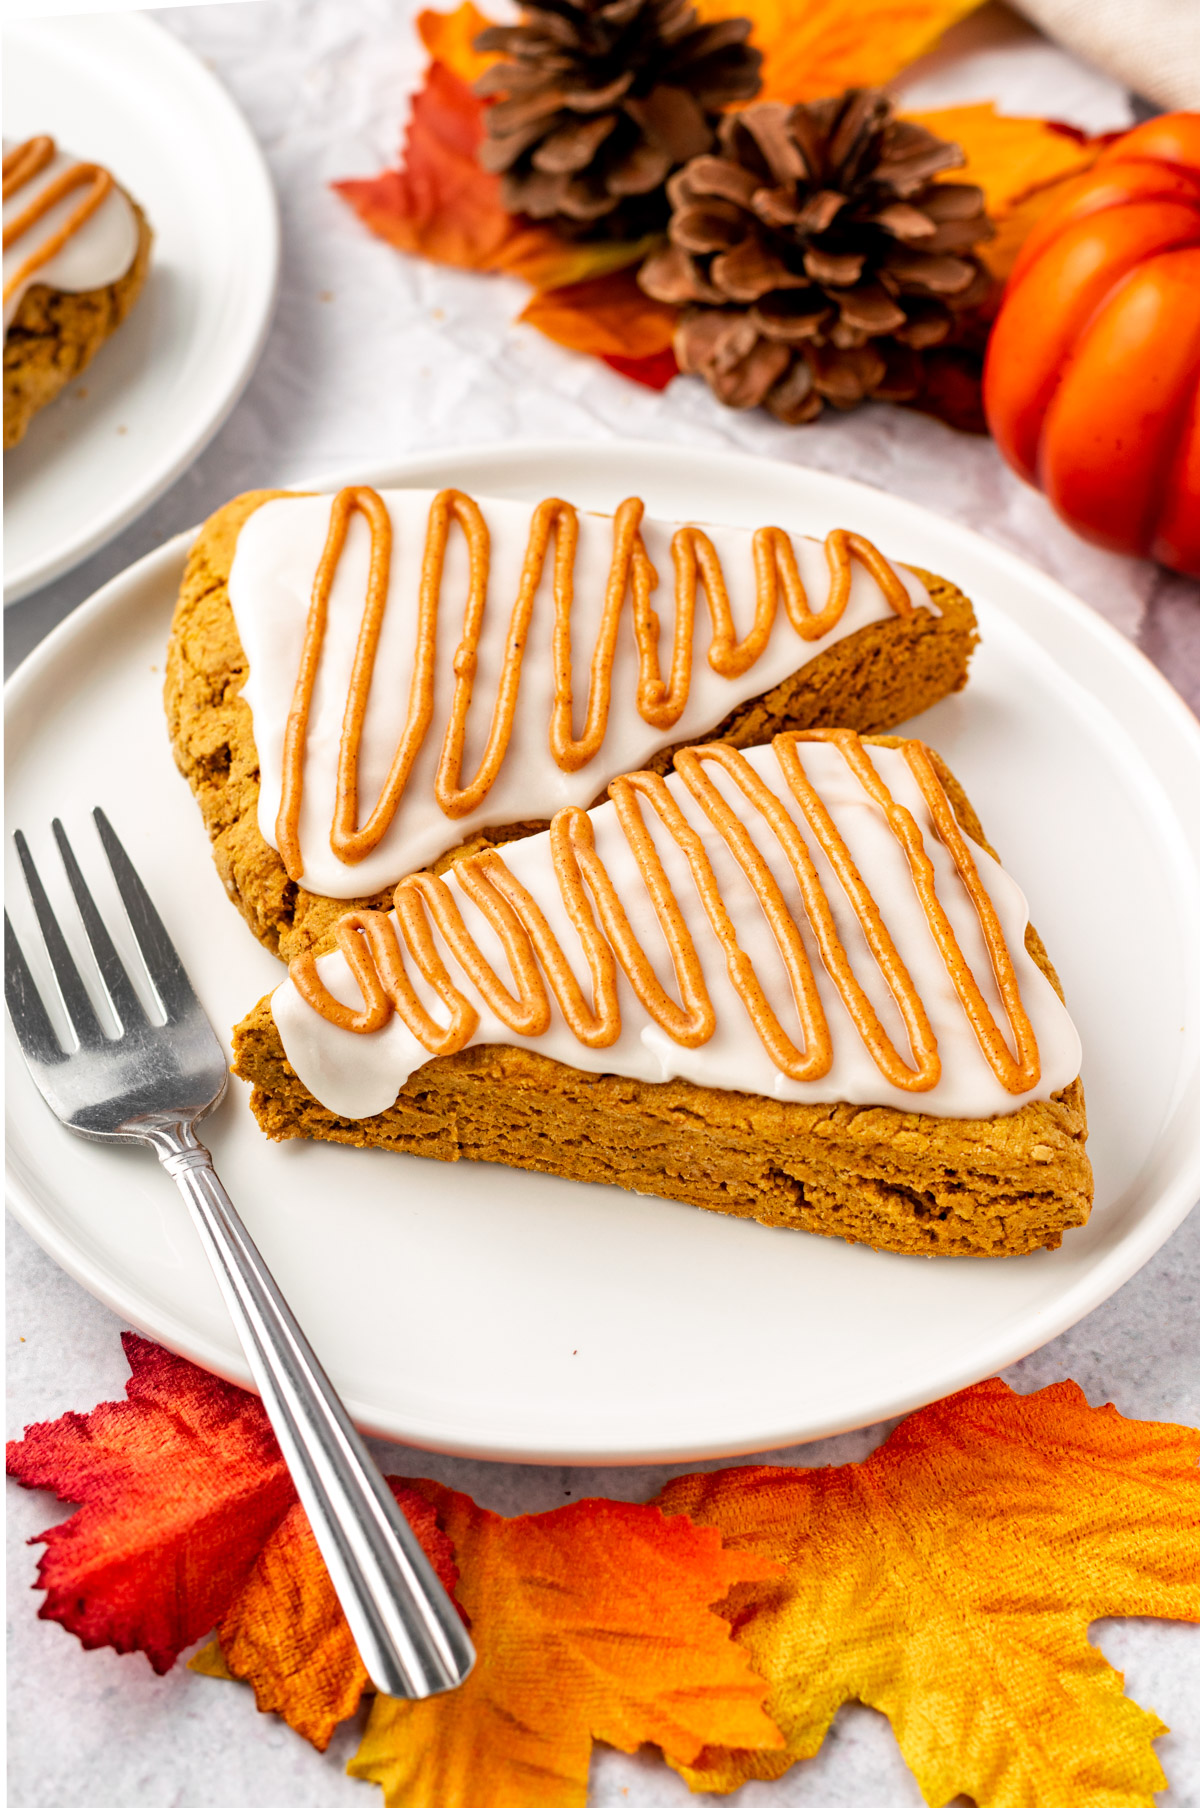
The classic Starbucks pumpkin scones have a double glaze: the bottom being a plain white glaze and a drizzle of a pumpkin spice glaze. These copycat scones follow a similar style.
Glaze Ingredients
- Icing sugar
- Dairy-free milk
Pumpkin Glaze Ingredients
- Icing sugar
- Pumpkin purée
- Pumpkin pie spice
- Dairy-free milk

Step-by-Step Instructions
Be sure to read the recipe card below for the full ingredient list and instructions.
Baking the Scones
(Prep) To make dairy-free buttermilk, add 1 teaspoon white vinegar to a measuring cup and fill to the ¼ cup line with your dairy-free milk of choice (mine is almond or cashew). Mix and let sit for 5 minutes before using. The general rule of thumb is 1 tablespoon vinegar per cup of buttermilk you need.
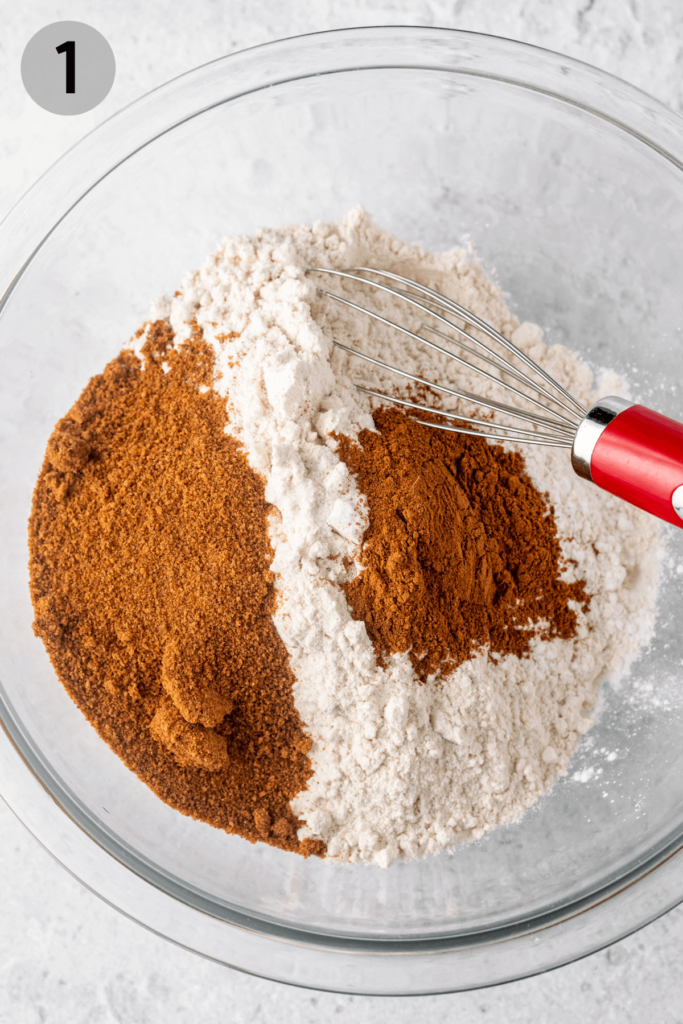
(1) Preheat your oven to 425°F. In a large bowl, whisk together the flour, baking powder, baking soda, salt, pumpkin pie spice, and sugar.
(2) In a separate medium sized bowl, whisk together the pumpkin purée, buttermilk mixture, egg, and vanilla.

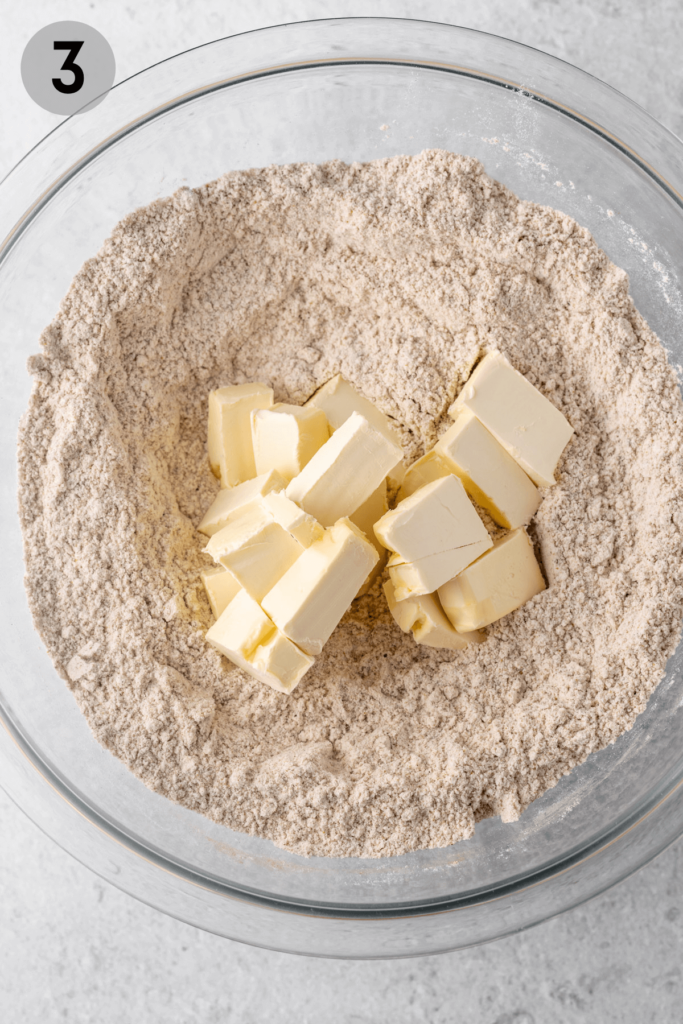
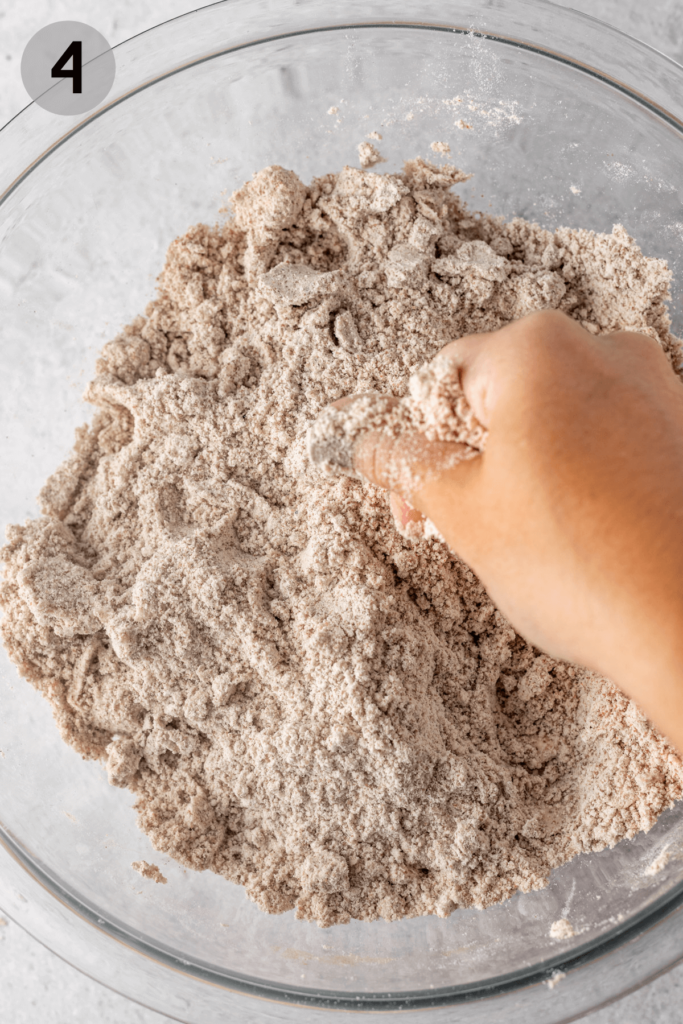
(3) & (4) Once combined, use your hands or a pastry cutter to incorporate the cold butter with the dry ingredients. It will be slightly chunky with larger chunks of butter, and that's okay. Make a well in the centre.
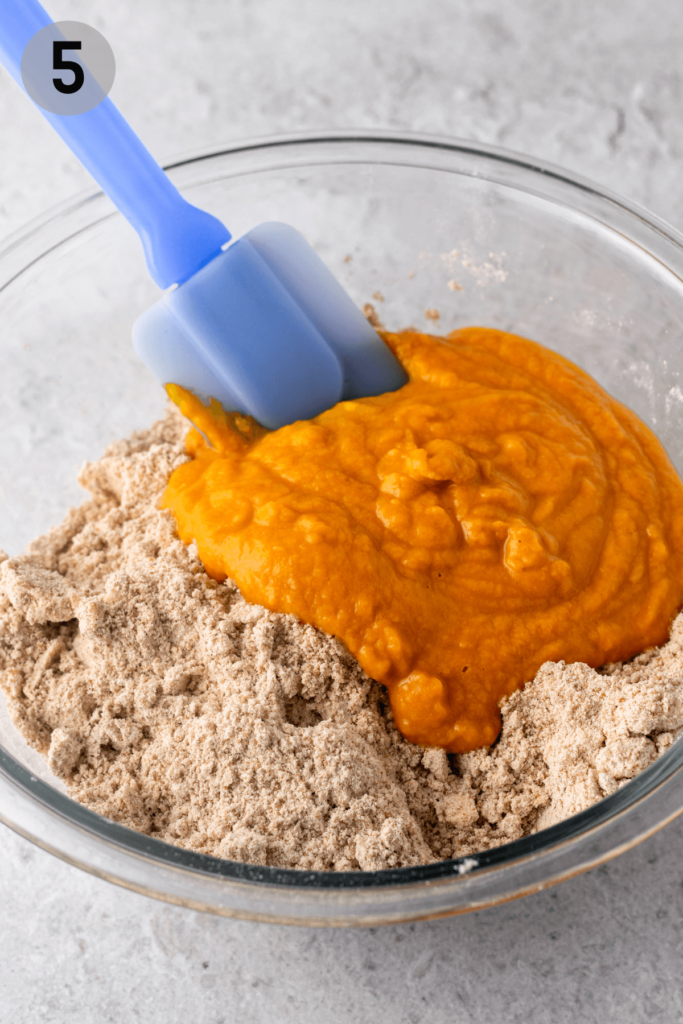
(5) Pour the wet mixture into the dry ingredients and mix until combined. Start out with a spatula. The dough will be quite sticky.
(6) Flour a surface and turn the dough out of the bowl. Flour your hands and knead the dough together.
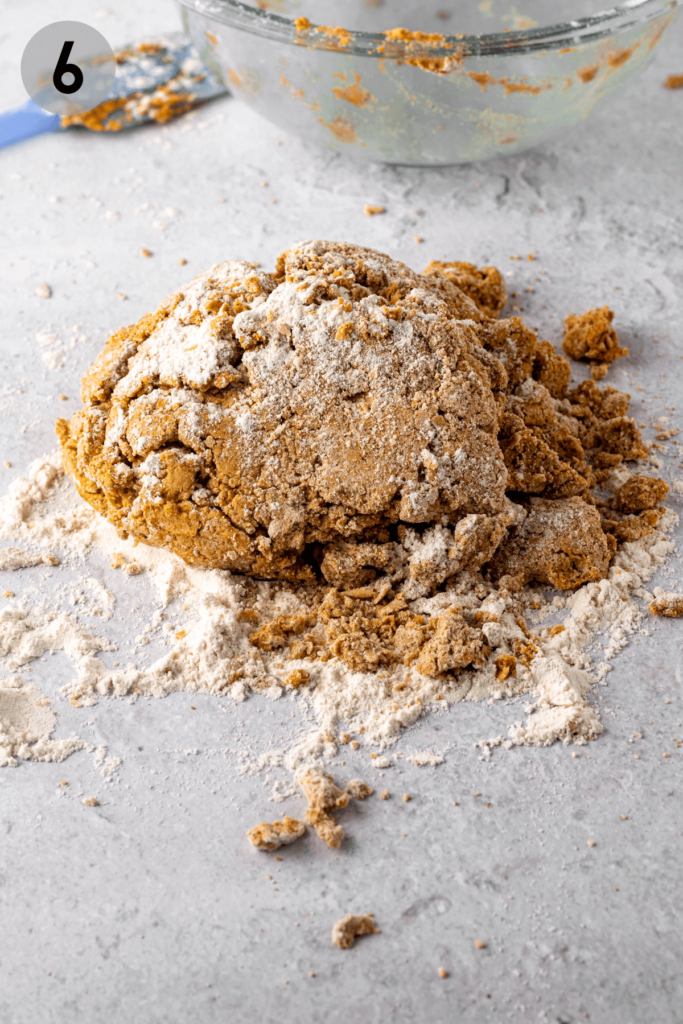
(7) Flatten into a circle about 8-inches wide and ½-¾" thick. Cut into 8 slices and transfer the scones to a baking sheet lined with parchment paper.
(8) Brush the tops with dairy-free milk.

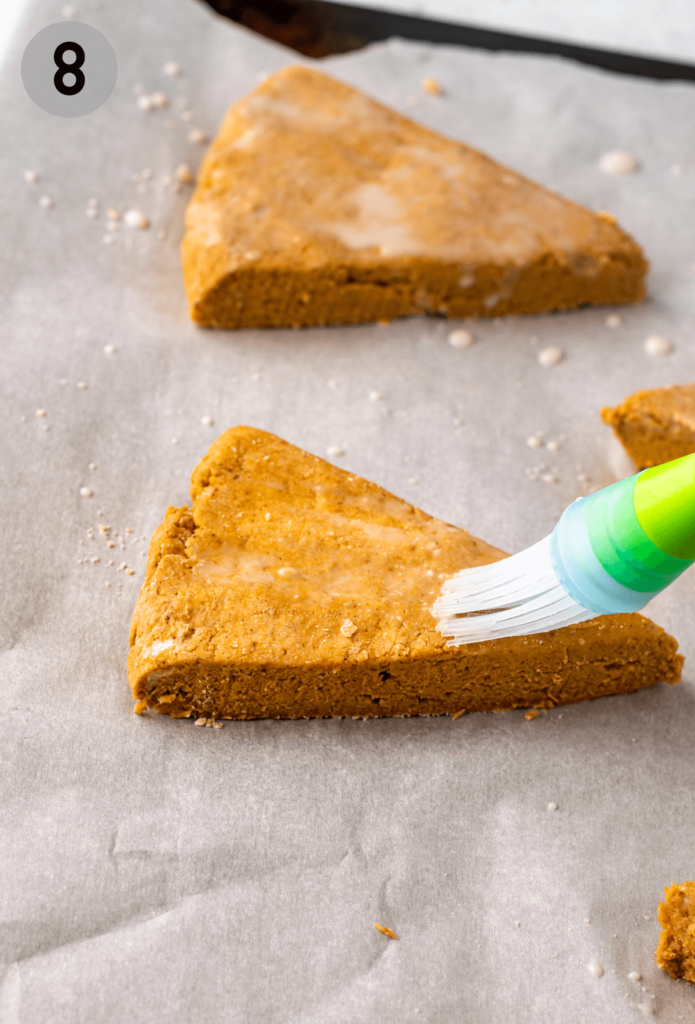
(9) Bake for 12-15 minutes, until firm with light colour. Immediately transfer to a wire cooling rack. Let cool for 10 minutes, and no more.
Icing the Scones
(10) To make the white glaze, combine the powdered sugar and milk in a small bowl and stir until smooth.
(11) Once the scones have cooled for 10 minutes, spread the glaze on the tops with an offset spatula. I like to do this with the scones still on the wire rack, with parchment underneath to catch any drips. Let set at room temperature while you make the pumpkin glaze.


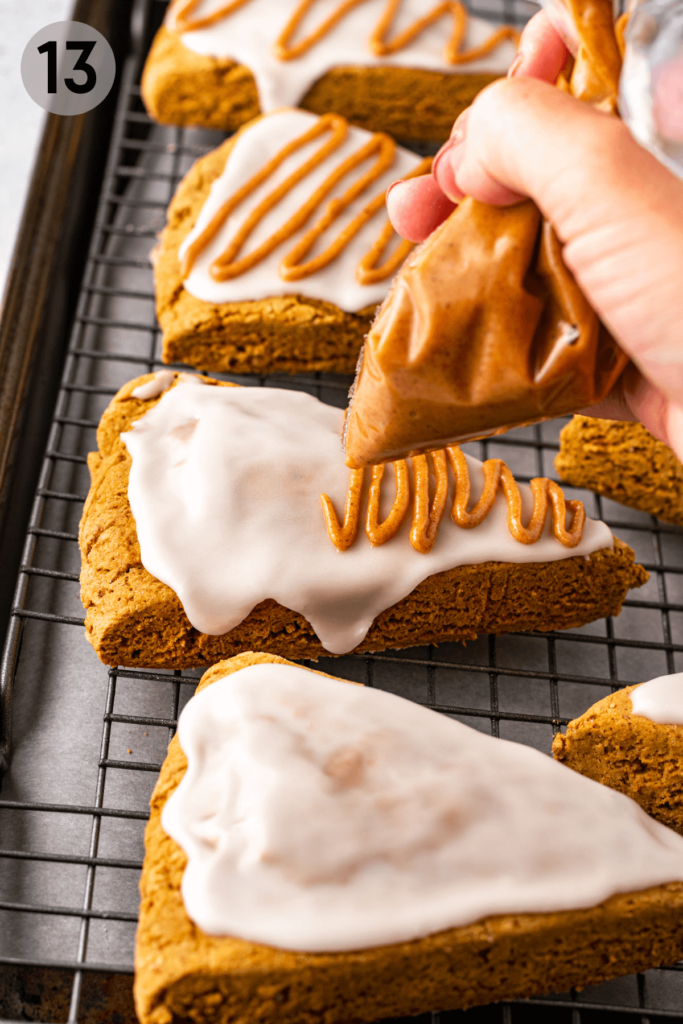
(12) To make the pumpkin glaze, combine ingredients in the bowl previously used for the first glaze.
(13) Place the glaze into a small piping bag or ziplock bag, cut the tip, and drizzle over the scones.
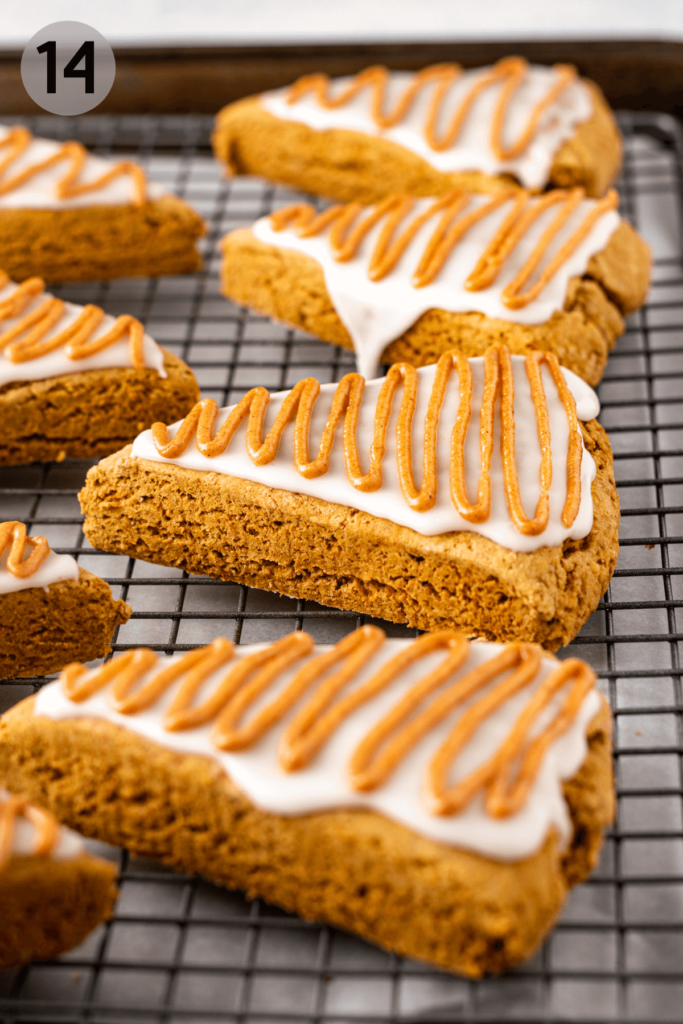
(14) Let set at room temperature. The scones are best served the day they're made. Enjoy!

Storage & Freezing Instructions
Gluten-free pumpkin scones can be stored in the fridge for a few days, however if they will not be eaten immediately, I recommend keeping them frozen in an airtight container with parchment paper between layers. When ready to eat, let them thaw completely at room temperature, or warm in intervals in the microwave. You may notice a small amount of condensation on the top of the scones. Enjoy!
How to Serve
There are so many ways to enjoy your homemade gluten-free pumpkin scones. Here are some suggestions:
- Eat as a quick morning breakfast
- Pack as a to-go snack
- Serve at a fall brunch
- Enjoy with a warm cup of coffee or pumpkin spice latte
- Indulge as a warm and cozy dessert!

Expert Tips
Here are some of my top tips and tricks for successful gluten-free pumpkin scones, everytime:
- Keep the butter as cold as possible. This is why it's incorporated only just when it's needed.
- Try to eliminate lots of extra flour on the surface of the scones. Yes, you need some flour to knead and shape the dough, but too much and you will taste the flour on the final product.
- Let the scones cool for just 10 minutes before adding the first glaze. This is the perfect amount of time for the scones to be cool enough to not completely melt the glaze, but warm enough to help it glide evenly across the top of the scone.
- Let the first glaze cool and harden to the touch before adding the pumpkin glaze. Just make sure you can run your finger along the top and it's not wet. This will help in defining the 2 glaze layers so they don't blend together.
- Best served on the day they're made, or freeze. This will keep the scones in peak freshness and keep the glazes in good condition without condensation.

Frequently Asked Questions
Nope! That's why we are making our own at home, gluten-free, dairy-free, and much better for you.
The egg is integral in the binding of the scone dough. You could try using an egg replacement like a flax egg or applesauce, although I have not tested the recipe this way. If you try it, leave a comment below and let me know how it was!
Scone dough should not be so sticky that you can't get it off your hands. Dust your surface with a little extra gluten-free flour and knead for a few minutes. They should some together so you can shape and cut the scones.
You may have kneaded in too much additional gluten-free flour when shaping the scones. It's okay, they will still bake up deliciously. Be sure to brush the tops with dairy-free milk for some moisture before baking.
Scones will be dry to the touch. They won't have much golden colour, but the edges should be firm and ever so slightly coloured. You will be able to see the layers and texture of the sides of the scones.
Scones can be stored in the fridge for a few days, however if they will not be eaten immediately, I recommend keeping them frozen in an airtight container with parchment paper between layers. When ready to eat, let them thaw completely at room temperature, or warm in intervals in the microwave. You may notice a small amount of condensation on the top of the scones, but they will still be delicious.

These gluten-free and dairy-free Starbucks-inspired pumpkin scones are sure to be a crowd pleaser! Whether it's brunch, a coffee break, or dessert, whoever you serve these deliciously spicy scones to are going to love them!
Have you made these allergy-friendly pumpkin scones? Be sure to leave a comment telling me how much you loved them, and tag me on instagram @fromoliviaskitchen! I hope you enjoy as much as I do!
More Fall Recipes You'll Love


Recipe

Gluten-Free Pumpkin Scones (Starbucks Copycat)
Ingredients
Scones
- 2¼ cups gluten-free all-purpose flour I use Bob's Red Mill 1:1 Baking Flour (blue bag)
- 2 teaspoon baking powder
- 2 teaspoon pumpkin pie spice mix of cinnamon, nutmeg, ginger, cloves
- ½ teaspoon baking soda
- ½ teaspoon salt
- ½ cup coconut sugar could sub brown sugar
- ⅔ cup pumpkin purée
- ¼ cup buttermilk* ¼ cup dairy-free milk + 1 teaspoon white vinegar, see note for how to make dairy-free buttermilk
- 1 large egg
- 1 teaspoon vanilla extract
- ½ cup vegan butter, cold & cubed ideally use a vegan butter in brick form, could sub regular butter if you're not dairy-free
Glaze
- 1 cup powdered sugar
- 1 tablespoon dairy-free milk, and more if needed
Pumpkin Glaze
- 1 cup powdered sugar
- 1 tablespoon pumpkin purée
- ½ teaspoon pumpkin pie spice
- ½ teaspoon dairy-free milk, and more if needed
Instructions
Baking the Scones
- Preheat your oven to 425°F. In a large bowl, whisk together the flour, baking powder, baking soda, salt, pumpkin pie spice, and sugar. In a separate medium sized bowl, whisk together the pumpkin purée, buttermilk mixture, egg, and vanilla.
- Use your hands or a pastry cutter to incorporate the cold butter with the dry ingredients. It will be slightly chunky with larger pieces of butter, and that's okay. Make a well in the centre. Pour the wet mixture into the dry ingredients and mix until combined. Start out with a spatula. The dough will be quite sticky.
- Flour a surface and turn the dough out of the bowl. Flour your hands and knead the dough together. Then flatten into a circle about 8-inches wide and ½-¾" thick. Cut into 8 slices and transfer the scones to a baking sheet lined with parchment paper. Brush the tops with dairy-free milk.
- Bake for 12-15 minutes, until firm with light colour. Immediately transfer to a wire cooling rack. Let cool for 10 minutes, and no more.
Icing the Scones
- To make the white glaze, combine the powdered sugar and milk in a small bowl and stir until smooth. Once the scones have cooled for 10 minutes, spread the glaze on the tops with an offset spatula. I like to do this with the scones still on the wire rack, with parchment underneath to catch any drips. Let set at room temperature while you make the pumpkin glaze.
- To make the pumpkin glaze, combine ingredients in the bowl previously used for the first glaze. Place the glaze into a small piping bag or ziplock bag, cut the tip, and drizzle over the scones. Let set at room temperature. The scones are best served the day they're made. Enjoy!
Wally says
The scones were easy to make but I wish they had more pumpkin flavor in them. Next time I will increase the pumpkin spice.
Olivia Parsons says
So glad you enjoyed Wally! I love the flavour of these scones.
Trish says
Absolutely delicious!!! Love this recipe, really tastes just like the Starbucks scones that I loved before developing celiac. Yyuuummmyyyy!!!!!👍
Amy says
Perfectly balanced. Love these.